

A Complete Guide to ADA Handicap Parking Specifications
When you're dealing with commercial property, getting your ADA handicap parking specifications right isn't just a good idea—it's the law. These aren't suggestions; they're precise requirements that ensure everyone has safe and fair access to your facility. From a contractor's perspective, this is where precision matters most.
The Foundation of Accessible Parking Design
At its core, accessible parking design is about creating an inclusive environment. It’s a blueprint laid out by law, covering everything from the exact number of spaces you need to how they're measured, marked, and positioned. Getting this foundation right from the start saves you from massive headaches, potential lawsuits, and costly do-overs down the road.
The Americans with Disabilities Act (ADA), enacted way back on July 26, 1990, set the gold standard for this. It was designed to guarantee equal access for the 35 million Americans who have mobility challenges. The rules are crystal clear: a standard accessible parking space must be at least 96 inches (8 feet) wide, and it needs a 60-inch (5-foot) access aisle right next to it. For van-accessible spaces, those requirements get even stricter to accommodate lifts and ramps. In fact, for every six accessible spots you have, at least one of them must be van-accessible.
Why Compliance Matters
Let's be blunt: proper ADA parking is about much more than just avoiding fines. It shows your community that you're a business that welcomes everyone. Ignoring these rules doesn't just open you up to penalties and legal action; it actively puts up a barrier for people who depend on these spaces.
For property managers and striping contractors, mastering these specs is non-negotiable. Here's why it's so critical:
- Avoiding Legal Penalties: The fines for non-compliance are steep at federal, state, and local levels. They don't mess around.
- Enhancing Customer Experience: A property that’s easy to access is a property that people will return to. It’s just good business.
- Mitigating Risk: A fully compliant lot is your best defense against accessibility-related lawsuits and helps keep everyone on your property safer.
- Streamlining Projects: Doing it right the first time is always cheaper than fixing it later. Miscalculations can wreak havoc on project budgets. To get a better handle on your finances, check out our guide on parking lot restriping costs.
To help you visualize what a compliant layout looks like, here’s a typical setup showing how the stalls, access aisles, and signage all work together. A clear photograph or diagram of a compliant space is crucial for understanding the interplay of these elements. This visual representation drives home how important every measurement and marking is. Getting these details wrong is what trips people up. In this guide, we'll break down every single component, giving you a complete resource to make sure your lot is safe, accessible, and 100% compliant.
Core ADA Parking Requirements at a Glance
For a quick reference, here’s a table that summarizes the absolute minimums you need to know for both standard and van-accessible spaces.
| Specification | Standard Accessible Space | Van-Accessible Space |
|---|---|---|
| Stall Width | Minimum 96 inches (8 feet) | Minimum 132 inches (11 feet) OR 96 inches (8 feet) |
| Access Aisle Width | Minimum 60 inches (5 feet) | Minimum 60 inches (5 feet) if stall is 132" wide |
| Minimum 96 inches (8 feet) if stall is 96" wide | ||
| Access Aisle Location | Adjacent to the parking stall on the passenger side | Adjacent to the parking stall on the passenger side |
| Markings | "NO PARKING" within the access aisle; International Symbol of Accessibility | "NO PARKING" within the access aisle; International Symbol of Accessibility |
| Signage | Required at the head of the space | Required, must include "Van-Accessible" designation |
Think of this table as your cheat sheet for the basics. While these are the federal minimums, remember to always check your state and local codes, as they can sometimes be more stringent.
Calculating the Required Number of Accessible Spaces
Getting the stall count right is the first—and most critical—step in any ADA-compliant parking project. This isn’t a matter of guesswork; the 2010 ADA Standards for Accessible Design lay out a precise formula. Whether you're striping a small 20-spot retail lot or a massive parking garage, the calculation is non-negotiable.
The number of required accessible spaces is tied directly to the total number of parking stalls in a facility. This ensures that as a lot gets bigger, its accessible capacity scales accordingly. It all starts with a simple count of your total spaces.
Required Minimum Number of Accessible Parking Spaces
To make this easy, here's a direct breakdown from the ADA standards. This table shows exactly how many accessible car and van spaces you need based on the total parking capacity of your lot.
| Total Parking Spaces in Lot | Minimum Required Accessible Spaces | Minimum Required Van-Accessible Spaces |
|---|---|---|
| 1 to 25 | 1 | 1 |
| 26 to 50 | 2 | 1 |
| 51 to 75 | 3 | 1 |
| 76 to 100 | 4 | 1 |
| 101 to 150 | 5 | 1 |
| 151 to 200 | 6 | 1 |
| 201 to 300 | 7 | 2 |
| 301 to 400 | 8 | 2 |
| 401 to 500 | 9 | 2 |
| 501 to 1,000 | 2% of total | 1 in every 6 accessible spaces |
| 1,001 and over | 20, plus 1 for each 100 over 1,000 | 1 in every 6 accessible spaces |
As you can see, the requirements scale predictably. This table should be your go-to reference during the planning phase to ensure your layout starts on a compliant foundation.
Understanding the Calculation Tiers
The ADA uses a tiered system, which can sometimes catch people off guard. For instance, in a very small lot with 1 to 25 total spaces, you only need one accessible spot, but it must be van-accessible. This is a common point of failure on small jobs.
Once you move up in size, the ratio changes. A lot with 51 to 75 spaces needs a total of 3 accessible stalls, and one of those has to be for a van. For a much larger facility with 401 to 500 spaces, that number climbs to 9 accessible spots total.
It's also crucial to remember that the 2010 Standards, which have been in effect since March 15, 2012, superseded the old rules. A 250-space lot that was compliant under the old rules with 7 accessible spots (only 1 for a van) now requires 2 van-accessible stalls within that total of 7. If you're resurfacing or restriping an older lot, you absolutely have to bring it up to the current code. You can find a detailed breakdown of these requirements on the official ADA website.
Special Requirements for Medical Facilities
This is where many contractors get into trouble. Standard commercial calculations do not apply to certain medical facilities. The ADA recognizes the heightened need for accessibility at these locations and mandates a much higher percentage of accessible parking.
- Outpatient Facilities: A minimum of 10% of all patient and visitor parking must be accessible.
- Rehabilitation and Physical Therapy Centers: For facilities specializing in treating mobility-related conditions, the requirement jumps to 20% of patient and visitor parking.
Forgetting this distinction on a healthcare project is a costly mistake that will fail inspection every time. These specific ada handicap parking specifications are in place because the user base has a demonstrably higher need for them. For any lot over 1,000 spaces, the rule is 20 spots plus one for every 100 spaces over 1,000.
Stall and Access Aisle Dimensions
Once you've figured out how many accessible spaces you need, the real work begins: laying them out correctly. Getting the dimensions right for the stalls and their access aisles is non-negotiable. We're talking about precise measurements from the ADA handicap parking specifications, not just suggestions. Being off by even a few inches can make a space completely unusable for someone with a mobility device and land you in non-compliance.
The starting point for any compliant space is its width. Every standard accessible parking stall has to be at least 96 inches (8 feet) wide. This gives enough room for most vehicles, but the stall itself is only one part of the puzzle.
Right next to that stall, you absolutely must have a clearly marked access aisle. For a standard accessible space, this aisle needs to be at least 60 inches (5 feet) wide. This is the critical zone that allows someone to deploy a wheelchair, walker, or other mobility aid. It's perfectly fine—and very common—for two accessible spaces to share a single access aisle, as long as that aisle meets the minimum width requirement.
Standard Car vs. Van-Accessible Spaces
Van-accessible spaces are a different beast because they have to accommodate side-mounted wheelchair lifts, which need a lot more room to operate. To handle this, the ADA gives you two main options for striping a van-accessible space.
- Option 1 (The Wide Stall): Stripe the parking stall itself to be at least 132 inches (11 feet) wide. When you do this, you can pair it with a standard 60-inch (5-foot) access aisle.
- Option 2 (The Wide Aisle): Keep the stall at the standard 96-inch (8-foot) width, but make the access aisle next to it much wider—at least 96 inches (8 feet) as well.
This chart is a great quick-reference guide for figuring out the minimum number of accessible spaces you'll need based on your lot size.
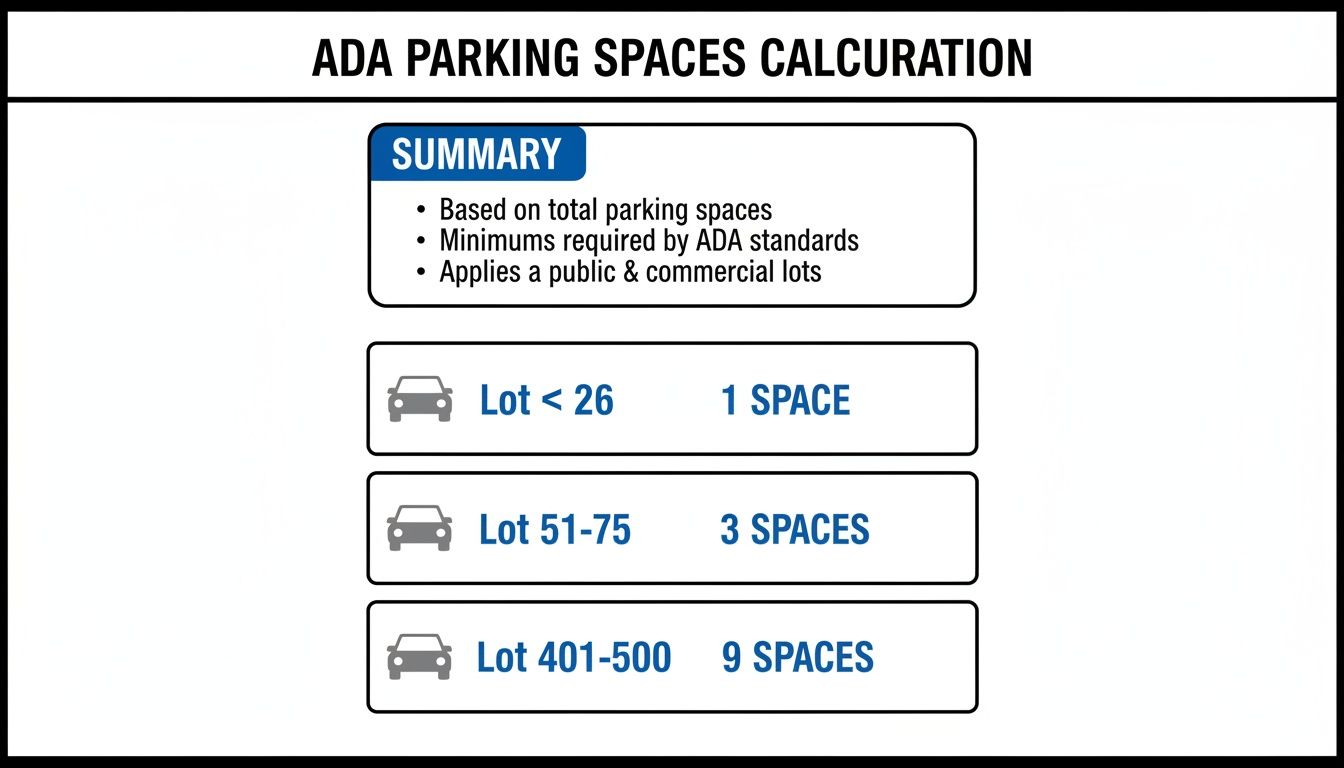
As you can see, the requirements scale up pretty logically, starting with one required van-accessible spot in a small lot and growing to nine total accessible spots in a 500-space lot.
Marking the Access Aisle Correctly
The access aisle is just as vital as the stall itself, and it has to be marked in a way that clearly tells people not to park in it. The ADA requires these aisles to be marked with diagonal stripes (often called hash marks) to make it obvious it's a no-parking zone. While not always a federal requirement, many local codes also demand that you paint the words "NO PARKING" within the striped area, which is always a good practice for extra clarity.
It's also crucial to remember that the access aisle must be the same length as the parking stall next to it. Finally, for both standard and van-accessible spaces, the entire area—the stall, the aisle, and the route leading to them—must have a minimum vertical clearance of 98 inches to accommodate vans with raised roofs.
Mastering Signage and Pavement Marking Requirements
Getting the dimensions right for stalls and aisles is only half the battle. ADA handicap parking specifications are just as strict about the visual cues—the signs and pavement markings that communicate a space's purpose. These aren't just decorative details; they are legally required elements that make a space identifiable and enforceable.
Think of it this way: a perfectly measured stall is useless if no one knows it's an accessible space. That's where the familiar white-on-blue International Symbol of Accessibility (ISA) comes in. Every single accessible parking spot must be marked with a sign featuring this symbol.
Required Signage Details
For a sign to be compliant, it has to be installed correctly. The rule of thumb is visibility. The bottom edge of the sign must be at least 60 inches above the ground. This specific height ensures the sign is clearly visible over the hood of a parked car and won't be easily obstructed.
Van-accessible spaces need an extra piece of information on their signs. Below the ISA, the sign must explicitly state “Van-Accessible.” This is a critical distinction for drivers operating wheelchair lifts, as they depend on the extra room provided by the wider access aisle.
Here’s a look at how these signs should be placed for full compliance, covering both the height and the specific text for van-accessible spots.
As you can see, the sign should be positioned at the head of the space, making it impossible to miss for both drivers looking for a spot and for enforcement personnel.
Pavement Marking Specifications
While signs handle the vertical identification, markings on the pavement itself provide another layer of clarity. Interestingly, federal ADA standards don't technically require the ISA to be painted on the ground within the stall. However, many state and local codes, including ours here in Texas, do. It's considered a best practice everywhere because it maximizes visibility.
The most important pavement marking, without a doubt, is for the access aisle. This area must be marked to prevent other vehicles from parking there and blocking access.
To be compliant, access aisles must be painted with diagonal stripes (hashing) to clearly show they are a no-parking zone. This visual barrier is fundamental to making the accessible stall truly usable.
These hash marks, typically white or yellow, send a clear message. For property managers and striping contractors, keeping these lines bright and well-defined is a key maintenance task. Nailing these techniques is crucial, and you can get a full rundown on the professional approach for how to stripe parking lots to ensure every line meets code.
When you combine properly mounted signs with crisp, clear pavement markings, you create a system that everyone can understand and respect, which is the entire point of the ADA standards.
Connecting to the Building: Location, Slope, and Accessible Routes
A perfectly striped space isn't compliant if it's in the wrong place. The ADA handicap parking specifications are crystal clear on this: accessible spaces must be on the shortest possible accessible route to the building's accessible entrance. The whole point is to minimize the distance and effort for individuals with disabilities.
Think of it as creating a direct, hazard-free path. You want to position these stalls as close as possible to accessible entrances, exits, and ramps. This creates a seamless transition from the vehicle to the destination, cutting down on the travel time and potential obstacles someone might face in the parking lot.
Of course, this entire path—from the stall and access aisle to the front door—needs to be built on a stable, firm, and slip-resistant surface. More importantly, the ground itself must be nearly level to ensure stability for people using wheelchairs, walkers, or other mobility aids.
Maximum Slope and Grade Limits
One of the most critical and easily missed details is the slope, or grade, of the parking area. To keep wheelchairs from rolling and provide a stable surface for people transferring from their vehicles, the ADA sets a very strict limit on steepness.
Both the parking stall and the access aisle next to it cannot have a slope steeper than 1:48 in any direction. That ratio works out to a maximum grade of 2.08%. This isn't just about the front-to-back slope; it also applies to the side-to-side (cross) slope. Go even slightly over this limit, and you've created a dangerous situation and a clear compliance failure.
An overly steep slope can make it incredibly difficult, if not impossible, to safely transfer from a vehicle to a wheelchair or operate a vehicle lift. The 1:48 rule isn't just a number; it's a safety standard grounded in the real-world physics of mobility devices.
This layout shows how a compliant stall and its access aisle should flow directly into a curb ramp and the main walkway.
As you can see, the design requires the access aisle to be level and lead directly to an accessible feature, like a ramp, without any obstructions blocking the way.
Tying Into the Accessible Route
The access aisle is the crucial link between the parking space and the accessible route. The ADA demands this connection be completely seamless and free of any barriers. This is where features like curb ramps come into play.
- No Curbs Allowed: There can never be a curb or step between the access aisle and the accessible route. A smooth, uninterrupted path is non-negotiable for wheelchair users.
- Smart Curb Ramp Placement: If there's a curb along the main walkway, a curb ramp is required. The key is that the ramp cannot stick out into the access aisle or the parking space itself, where it could become an obstruction.
- A Clear Path: The entire route must remain clear. You can't have trash cans, planters, signs, or building columns blocking the path from the access aisle to the building entrance.
In the end, location, slope, and the accessible route are all part of a single system. When planned correctly, they ensure the journey from the car to the front door is safe, direct, and fully compliant. If you get any one of these elements wrong, you can make an otherwise well-marked space completely unusable.
Navigating State and Local Accessibility Standards
Think of the federal ADA standards as the floor, not the ceiling. They set the minimum requirements, but state and local governments often have their own, more specific rules. For anyone working in Texas, that means you need to know the Texas Accessibility Standards (TAS) inside and out. The Texas Department of Licensing and Regulation (TDLR) enforces them, and they don't mess around.
Ignoring these local differences is one of the easiest ways to get a project flagged. While the TAS and ADA are mostly aligned, there are unique Texas-specific provisions that can trip you up. If you treat the ADA as your only guide, you can fail an inspection and face delays or fines, even if you’ve met every federal rule to the letter.
Key Differences in Texas Standards
The devil is always in the details, and that's especially true when comparing federal and state codes. For instance, Texas has very particular rules for signage that you won't find in the federal ADA guidelines. These might seem like minor points, but they are exactly what a TDLR inspector is trained to spot.
Here are a few common areas where Texas laws get more specific:
- Signage Fines: Texas has its own schedule of fines for parking illegally in an accessible space. Your signs must include this state-specific fine information.
- Tow-Away Language: Many local ordinances in Texas require signs to explicitly state that unauthorized vehicles will be towed at the owner's expense. This is a common local add-on.
- Pavement Markings: The federal ADA doesn't actually require the International Symbol of Accessibility to be painted on the ground. However, most cities and municipalities in Texas mandate it to make the space more visible.
This image shows a typical layout, highlighting where you'd need to place signs that meet these specific state and local requirements.
This layout makes it clear that it's not just about what the sign says, but also precisely where it's installed to meet all the different visibility rules.
Local Enforcement and Compliance Challenges
Beyond the written code, you have to consider how it's enforced on the ground. An inspector in Houston might prioritize different things than one in Dallas. Getting to know what your local inspectors look for is just part of the job and key to getting your projects approved without a hitch.
Proper compliance also plays a role in tackling the huge problem of placard abuse. The numbers are pretty shocking. For example, in Colorado, there were once 570,000 valid placards for 5.6 million residents—that's over 10% of the entire population. You can see how an oversupply of placards strains the limited number of accessible spaces. While Texas law is clear about prohibiting placard misuse, enforcement isn't always consistent. This is where your work comes in: clear, code-compliant striping and markings help deter improper use and are critical for passing your inspections. The Accessible Parking Coalition has more data on this ongoing challenge.
The takeaway is simple: Federal ADA guidelines are your starting point, not your finish line. Always consult the current Texas Accessibility Standards and local municipal codes before striping a single line to guarantee complete and total compliance.
Ultimately, you have to be diligent. Before starting any project, pull up the latest TAS regulations and check the city ordinances for your specific location. This upfront work will save you from expensive redos down the line and shows you’re serious about getting accessibility right from the ground up.
Avoiding Common ADA Parking Compliance Violations
Even with the best of intentions, it’s surprisingly easy to miss the mark on ADA handicap parking specs. These common violations don't just create real barriers for people with disabilities; they can also open you up to hefty fines and legal action. Getting familiar with these frequent slip-ups is the best way to make sure your property is safe, accessible, and up to code.
Many of these issues pop up from simple oversights during the striping and maintenance phases. We often see problems like faded paint, signs mounted at the wrong height, or poorly designed access aisles. The good news is that once you know what to look for, these are usually straightforward fixes.
Improper Signage Height and Content
One of the most common—and easily preventable—violations we see is signs being installed incorrectly. You might have a sign with the perfect International Symbol of Accessibility, but if it's mounted too low, it's not compliant.
- Problem: Signs are often installed with the bottom edge less than 60 inches from the ground, which makes them hard to spot over a parked car or SUV. Another frequent miss is forgetting to include the "Van-Accessible" text on signs for those specific spaces.
- Solution: Always measure from the ground surface to the bottom edge of the sign to confirm it’s at least 60 inches high. For your van-accessible stalls, do a quick visual check to ensure the "Van-Accessible" designation is present and clearly visible.
This image shows a compliant layout where signs are properly placed at the head of each space, ensuring they are immediately visible to drivers.
The key takeaway here is that where you put the sign is just as important as what is on it. Proper placement is essential for immediate recognition and full compliance.
Incorrect Access Aisle Markings
The access aisle is absolutely critical for an accessible space to function, yet it’s often the source of errors. When it's not marked correctly, it creates confusion and invites other vehicles to block the very area someone needs to exit their vehicle.
- Problem: The access aisle is missing the required diagonal hash marks, or the paint has faded so much it's barely visible. In other cases, the aisle is striped, but there’s no "NO PARKING" stencil. While not always a federal mandate, it’s a best practice that many local codes (like Houston's) require.
- Solution: Make sure your access aisles are clearly marked with diagonal stripes painted across the entire area. Get in the habit of checking these markings regularly and re-striping as soon as they start to fade. Adding a "NO PARKING" stencil is a small investment that adds a ton of clarity and helps prevent misuse.
Excessive Slope in Stalls and Aisles
Slope is one of the most serious violations because it's a direct safety issue. If the grade is too steep, it can be incredibly difficult for someone to control a wheelchair or operate a vehicle lift safely.
The ADA is very clear on this: both the parking stall and the adjacent access aisle cannot have a slope greater than 1:48 (which is 2.08%) in any direction. This is a non-negotiable safety requirement.
- Problem: A lot gets resurfaced, but no one checks the grade, resulting in stalls and aisles that are too steep. This happens all the time when a new layer of asphalt is put down over an old, uneven surface.
- Solution: Before any striping begins, grab a digital level and verify the slope in the areas you've designated for accessible parking. If the grade is over that 1:48 limit, the surface itself has to be fixed before you can paint. Taking this step upfront saves you from expensive rework and ensures the space is safe for everyone.
Common Questions About ADA Parking Specs
Even for seasoned property managers and contractors, the finer points of ADA handicap parking specifications can bring up a few questions. Let's tackle some of the most common ones to help you keep your property compliant and accessible.
When Do I Need to Update My Lot to Current ADA Standards?
This is a big one. You're generally required to bring your accessible parking up to the current 2010 ADA Standards whenever you make alterations to your parking facility. Think of it as a "triggering event."
What counts as an alteration? Resurfacing, repaving, or a full re-stripe of the lot definitely falls into this category. Simply repainting your existing lines without changing the layout might not automatically trigger the requirement, but it’s always best practice. If you're already investing in maintenance, it’s the perfect time to upgrade to full compliance. This proactive approach helps ensure accessibility and heads off potential violations down the road.
During any alteration, every component—from the stall width to the height of your signs—must meet the latest requirements. It's an all-or-nothing situation when it comes to compliance.
Can Two Accessible Parking Spaces Share an Access Aisle?
Yes, absolutely. Having two accessible spaces share a common access aisle is a very common, efficient, and fully compliant design. The key is making sure the dimensions are correct for both the stalls and the shared aisle.
The shared access aisle must be located between the two spaces. It needs to be at least 60 inches wide. However, if that shared aisle serves a van-accessible space, it must be at least 96 inches wide to provide enough room for a lift.
Using a shared access aisle is a smart way to maximize your space while sticking to the ADA guidelines. Just remember to measure carefully—the width must be appropriate for the types of spaces it serves and, as always, it must be kept completely clear and unobstructed.
What Is the Difference Between Standard and Van Accessible Spaces?
The main distinction between standard and van-accessible spaces comes down to the width of the access aisle. This difference is critical for accommodating various vehicles and mobility equipment, especially wheelchair lifts.
Here’s the breakdown:
- Standard Accessible Space: Requires an adjacent access aisle that is at least 60 inches (5 feet) wide.
- Van-Accessible Space: Needs a much wider access aisle, at least 96 inches (8 feet) wide, to give a wheelchair lift enough room to safely deploy from the side of a van.
Another key rule: for every six accessible spaces (or fraction of six), at least one must be van-accessible. This spot also needs a sign that explicitly includes the phrase "Van-Accessible." If you're looking for more details on this topic, we cover these requirements extensively in our articles on accessible parking.
Are Wheel Stops Required in ADA Parking Spaces?
The 2010 ADA Standards don't actually require wheel stops (also called car stops or parking blocks) in accessible spaces. You can use them, but only if they don't create an obstruction.
If you decide to install wheel stops, their placement is critical. They must be positioned so that a vehicle’s front overhang doesn’t jut into the accessible route, reducing the clear width of an adjacent sidewalk or walkway to less than the required 36 inches. A poorly placed wheel stop can easily turn a compliant space into a violation by creating an unexpected barrier.
For professional help making sure your property meets every local and federal standard, you can always trust the experts. Houston Parking Lot Striping brings over 15 years of experience delivering precise, code-compliant results for general contractors and property managers. Contact us for a free estimate and let's get your project done right the first time. Learn more at https://houstonparkinglotstriping.com.