

How to Stripe Parking Lots a Professional Property Manager’s Guide
Knowing how to stripe a parking lot the right way boils down to a simple formula: plan a compliant layout, prep the surface, apply paint with a line striper, and let it cure properly. Following this process is the key to a safe, organized, and professional-looking lot that makes the most of your space while keeping you on the right side of the law.
Your Blueprint for a Perfect Parking Lot Layout
A top-notch striping job starts long before a single drop of paint hits the pavement. It all begins with a smart, compliant, and efficient layout plan. This is where you move beyond just painting lines and start designing a small-scale traffic grid that directs vehicles and protects pedestrians.
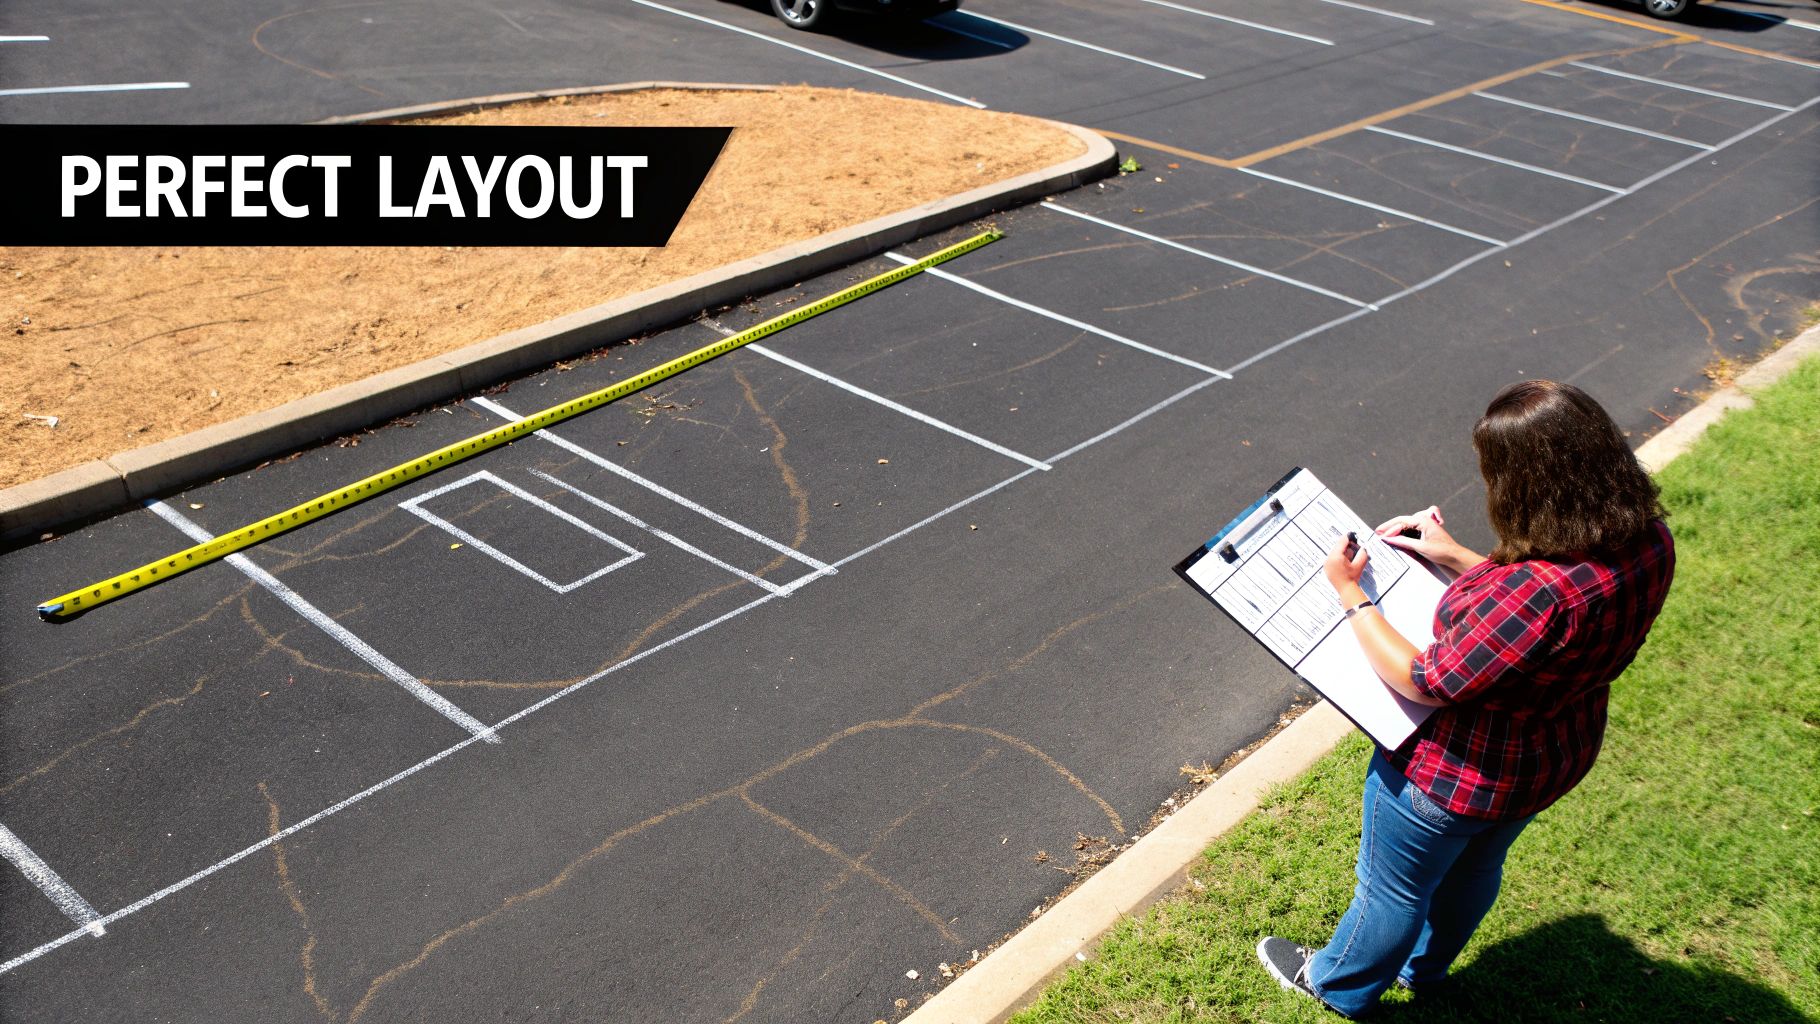
The first thing I always do is a thorough site assessment. You have to walk the property. Watch how traffic actually moves—not just how you think it moves. Where do cars enter and exit? Are there well-worn paths where people cut across to get to the entrance? Answering these questions first helps create a layout that feels intuitive and safe, cutting down on confusion and potential fender-benders.
This planning phase is absolutely crucial. It’s what separates a professional job from an amateur one.
Balancing Stall Count with Safety and Flow
Every property owner wants to squeeze in as many parking stalls as possible, but that can't come at the expense of safety and maneuverability. Cramming too many spots into a tight area just creates a nightmare for drivers and dramatically increases the risk of dings and collisions. The real art is finding that perfect balance.
For instance, 90-degree stalls are the most efficient use of space, but angled stalls (usually 45 or 60 degrees) are often far easier for drivers to pull in and out of, especially in lots with narrow drive lanes. The right choice depends entirely on your lot's specific dimensions and the traffic patterns you need to manage.
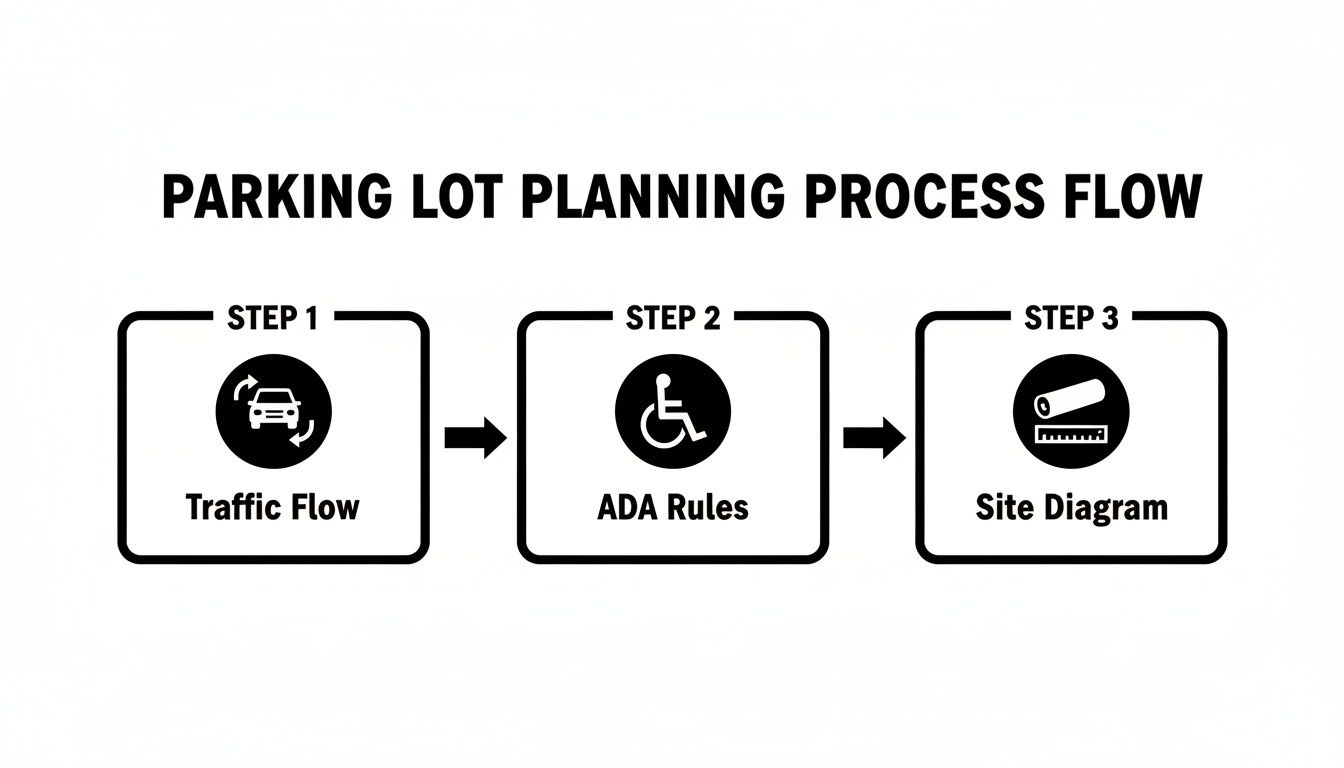
This process highlights how a great layout is a direct result of carefully thinking through traffic movement, legal requirements, and precise mapping.
Navigating Codes and Compliance
No layout is ready to go without a deep dive into local and federal regulations. This is, without a doubt, where most DIY projects fail. Fire lanes need to be clearly marked and completely unobstructed, with specific widths and markings dictated by your local fire marshal.
And then there’s the Americans with Disabilities Act (ADA). This is non-negotiable.
A well-planned parking lot does more than just provide a place for cars; it ensures safety, accessibility, and legal compliance, protecting property owners from potential fines and liability.
Professional striping is heavily influenced by these rules. In the U.S., ADA guidelines typically require 8-foot-wide accessible spaces with clearly marked adjacent access aisles. These have to be marked with blue striping and the international wheelchair symbol. For most commercial properties, at least 2–4% of the total spaces must be designated as accessible.
The global road marking materials market is projected to hit USD 7.5 billion by 2025, which just goes to show how critical this work is for maintaining safety and order.
As a quick reference, here are the essential dimensions you'll need to keep in mind.
Table: Essential Parking Stall Dimension Guidelines
| Stall Type | Standard Width | Access Aisle (ADA) | Typical Angle |
|---|---|---|---|
| Standard Stall | 9 feet | N/A | 90°, 60°, 45° |
| Accessible Stall (Car) | 8 feet | 5-foot aisle | 90° |
| Accessible Stall (Van) | 8 feet | 8-foot aisle | 90° |
These numbers are your starting point for any layout, ensuring you meet baseline requirements before you even start marking lines.
Creating Your Final Scaled Diagram
Once you’ve analyzed traffic flow and researched all the codes, it's time to create a scaled diagram. This is the blueprint you’ll follow on the job. Whether you use graph paper or simple design software, you need to map out every single element:
- Parking Stalls: Note their dimensions, angles, and the total count.
- ADA Spaces: Pinpoint their location, dimensions, and access aisles.
- Directional Arrows: Show exactly how you want traffic to move.
- Fire Lanes: Outline these critical zones based on local fire code.
- Pedestrian Crosswalks: Designate safe walking paths.
This detailed plan removes all the guesswork and ensures every line and symbol is placed with precision. For complex jobs, getting an expert opinion on your layout can save you a world of headaches. Learning more about the experience of professional teams like us at Houston Parking Lot Striping can give you a good sense of the detail required for a flawless project. Ultimately, a precise diagram is your guarantee of a functional, safe, and legally sound parking facility.
Choosing Your Tools and Materials for Lasting Results
The real difference between a striping job that looks sharp for years and one that fails in a single season boils down to the tools and materials you use. Investing a little more upfront in quality paint and equipment will save you a massive headache—and the cost of redoing the entire lot—much sooner than you think.
This isn't just a niche industry, either. It's a massive global market. The demand for line striping machines is expected to jump from about USD 1.88 billion in 2024 to USD 3.06 billion by 2033. At the same time, the market for the coatings themselves was valued at USD 5,485.2 million in 2023 and is projected to hit USD 8,332.6 million by 2030. What that means for contractors here in Houston is that pro-grade airless stripers and quick-curing paints are no longer a luxury; they're becoming the standard for getting jobs done efficiently. You can see more details on this growth over at Business Research Insights.
Selecting the Right Parking Lot Paint
Your choice of paint is, without a doubt, the most critical decision you'll make. Not all paints are the same, and what works best depends on your local climate, how much traffic the lot gets, and whether you're working on asphalt or concrete.
- Water-Based Acrylic Paint: This is the go-to for most jobs. It's easy to work with, dries fast, and you can clean up your gear with just water. For re-striping an existing lot or one with average traffic, this is usually your best bet.
- Solvent-Based (Oil-Based) Paint: This stuff is tough. It’s known for incredible durability and adhesion, especially when you have to paint in cooler weather. The trade-off is the higher VOC content and the need for mineral spirits for cleanup.
- Thermoplastic Markings: For the most demanding, high-traffic areas—think busy intersections or loading docks—thermoplastic is the top-tier choice. It’s a plastic material that’s heated and applied hot, bonding directly to the surface as it cools. The result is a super-thick, reflective line that lasts for years.
For most commercial lots in a climate like ours in Houston, a high-quality water-based acrylic paint gives you the best mix of performance, cost, and ease of use. Trust me, cheap paint is a false economy. It will have you back out there re-striping far too soon.
Essential Equipment for a Professional Job
While the paint is crucial, the equipment you use is what separates a professional job from an amateur one. If you're serious about learning how to stripe parking lots correctly, you have to invest in the right gear.
Walk-Behind Line Stripers
The heart of any striping operation is a professional-grade, walk-behind airless sprayer. These machines deliver consistent pressure, which is key to laying down crisp, even 4-inch lines at a normal walking speed. Look for a model that lets you adjust the pressure and has a locking front wheel to keep your lines perfectly straight. Trying to do a whole lot with aerosol cans and a roller is a recipe for a wavy, sloppy-looking disaster.
Stencils for Clear Communication
Stencils are non-negotiable for getting critical information across to drivers and staying compliant. You'll need a basic set that includes:
- ADA Wheelchair Symbol
- Numbers (0-9)
- Directional Arrows (straight and curved)
- Standard wording like "NO PARKING" and "FIRE LANE"
Go for durable polyethylene stencils. They cost a bit more, but they are easy to clean and will last for hundreds of jobs.
Choosing the Correct Spray Tips
That tiny spray tip on your line striper has a huge impact on your final product. It’s what actually shapes the paint stream and determines how sharp and wide your lines are. For standard parking stalls, you’ll want a tip designed specifically to produce a 4-inch wide line. One of the most common mistakes I see is people using a worn-out tip. It causes fuzzy, blurry edges and wastes paint.
A top-notch striping job is about more than just paint—it's about safety, compliance, and curb appeal. To get a better sense of the complete process and what goes into a flawless finish, exploring the full range of professional parking lot striping services can give you some valuable perspective.
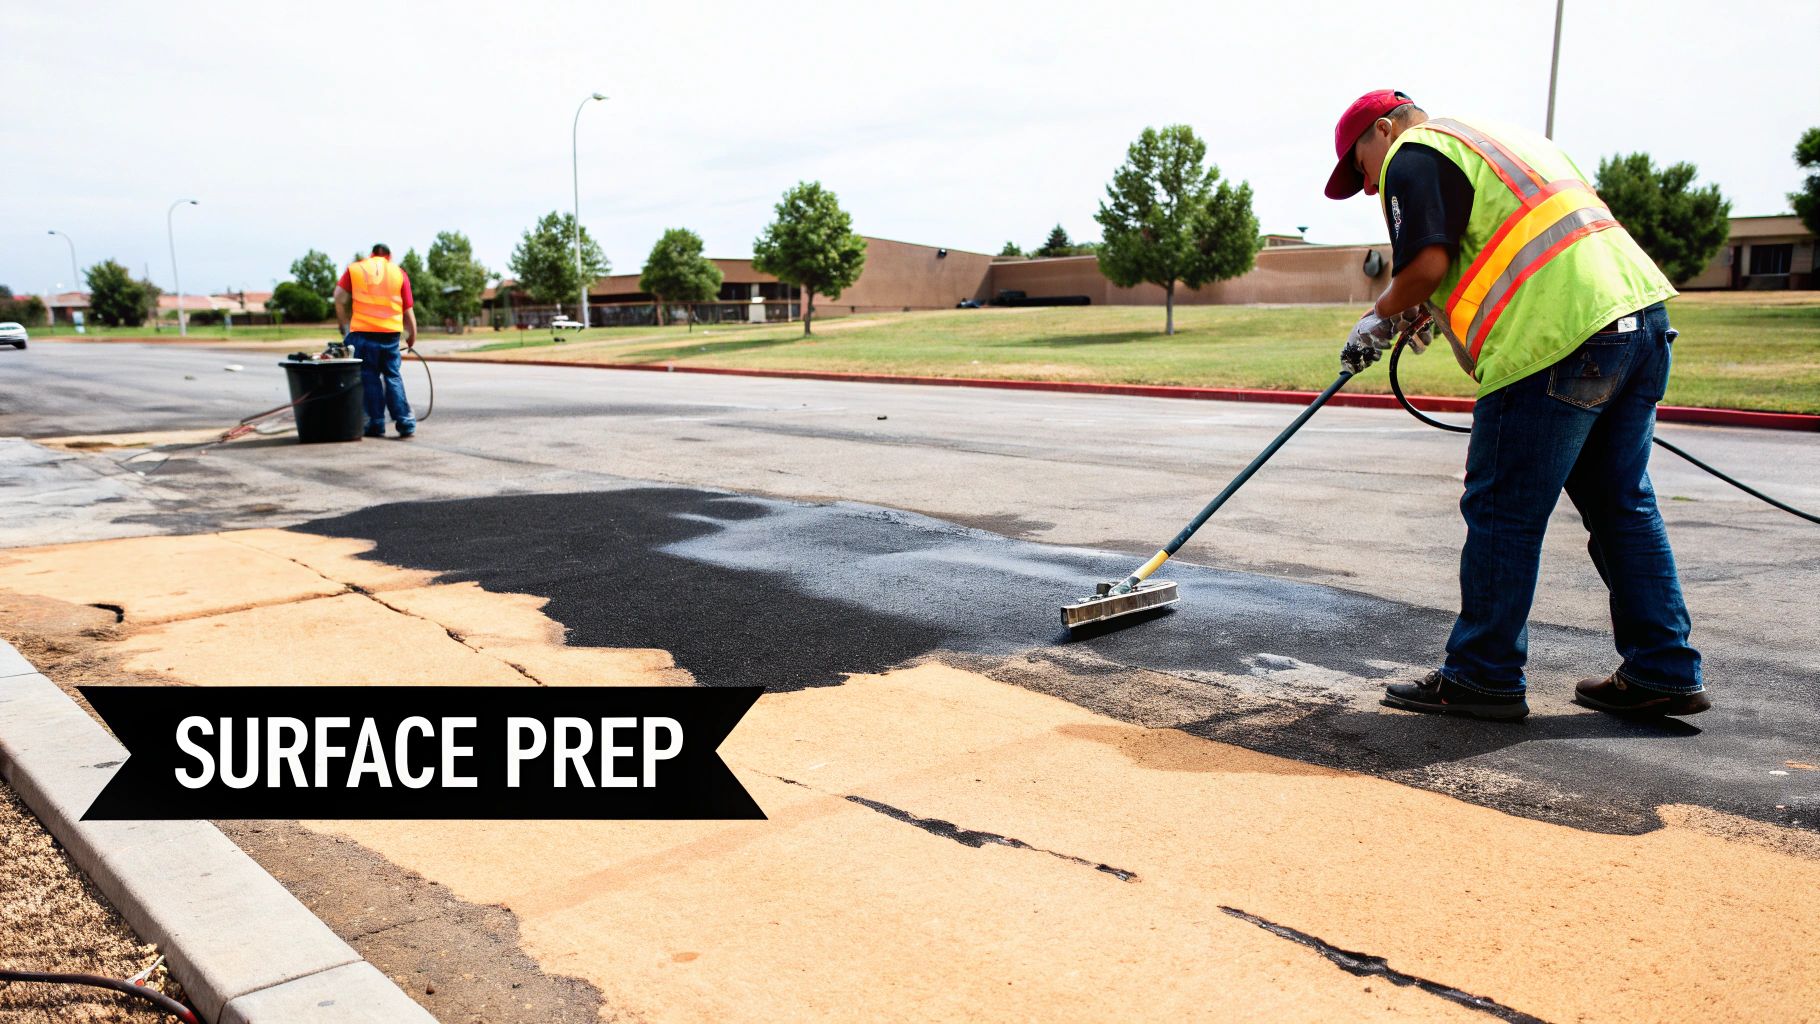
Preparing the Surface for a Flawless Finish
I can't say this enough: your striping job is only as good as the surface it’s painted on. You can have the best paint and the fanciest machine, but if you paint over dirt, oil, or failing old lines, your work simply won't last. Proper surface prep is where a professional job truly begins.
Think of it this way—you're not just painting lines, you're creating a bond between the paint and the pavement. Anything that gets in the way of that bond, from a fine layer of dust to a stubborn oil spot, is setting you up for failure. A clean, sound surface is the foundation for crisp, durable lines that can take a beating from traffic and weather.
Start with a Deep Clean
First things first, the entire lot needs a thorough cleaning. Over time, asphalt and concrete collect a nasty film of dirt, oil, antifreeze, and all sorts of other grime. This stuff is a bond-breaker.
The best tool for the job is a good pressure washer. It's the only way to truly blast away the built-up gunk that a simple blower or broom will leave behind. Pay extra attention to the parking stalls, especially the middle where cars tend to drip fluids. For really tough oil and grease spots, you’ll likely need to pre-treat them with a commercial degreaser before you wash. The goal here is a surface that is 100% free of dust, loose debris, and any oily residue.
Removing Old and Flaking Lines
When you’re re-striping a lot, you have to assess the condition of the old lines. If they're just faded but the paint is still firmly attached, you can often paint right over them after a good cleaning. But if you see any chipping, peeling, or cracking, you've got more work to do. Painting over failing paint means your new lines will peel right off with the old ones.
You’ve got a few options for getting rid of bad paint:
- Grinding: A concrete grinder or scarifier is my go-to for this. It physically chews off the old paint and leaves behind a slightly rough surface that new paint loves to stick to.
- Blasting: Sandblasting or high-pressure water blasting can also strip old paint, but you have to be careful not to damage the asphalt itself. It takes a bit of finesse.
- Chemical Strippers: These can work, but they're often messy and come with their own set of safety and disposal headaches. I typically use them as a last resort.
For most jobs, a good pressure wash is enough. But if the old paint is compromised, you absolutely have to get it off first.
Creating a smooth, clean canvas isn't just for looks—it’s about getting a physical bond that ensures your work will last for years, not months. Skipping this step is the fastest way to get an angry callback from a client.
Repairing Cracks and Potholes
Painting over cracks and potholes is a dead giveaway of an amateur job. It looks terrible and, more importantly, it does nothing to solve the underlying problem. Water will keep getting into those cracks, and the pavement will just continue to fall apart.
Before you lay down a single line, all significant surface damage needs to be fixed.
For cracks, use a hot-pour or cold-pour rubberized sealant to keep water out and create a smooth surface. Larger potholes need to be cleaned out, filled, and properly patched with new asphalt. Taking care of this is critical for two reasons: it protects the long-term integrity of the entire lot, and it gives you a smooth, level plane to paint on, which is essential for straight, professional-looking lines.
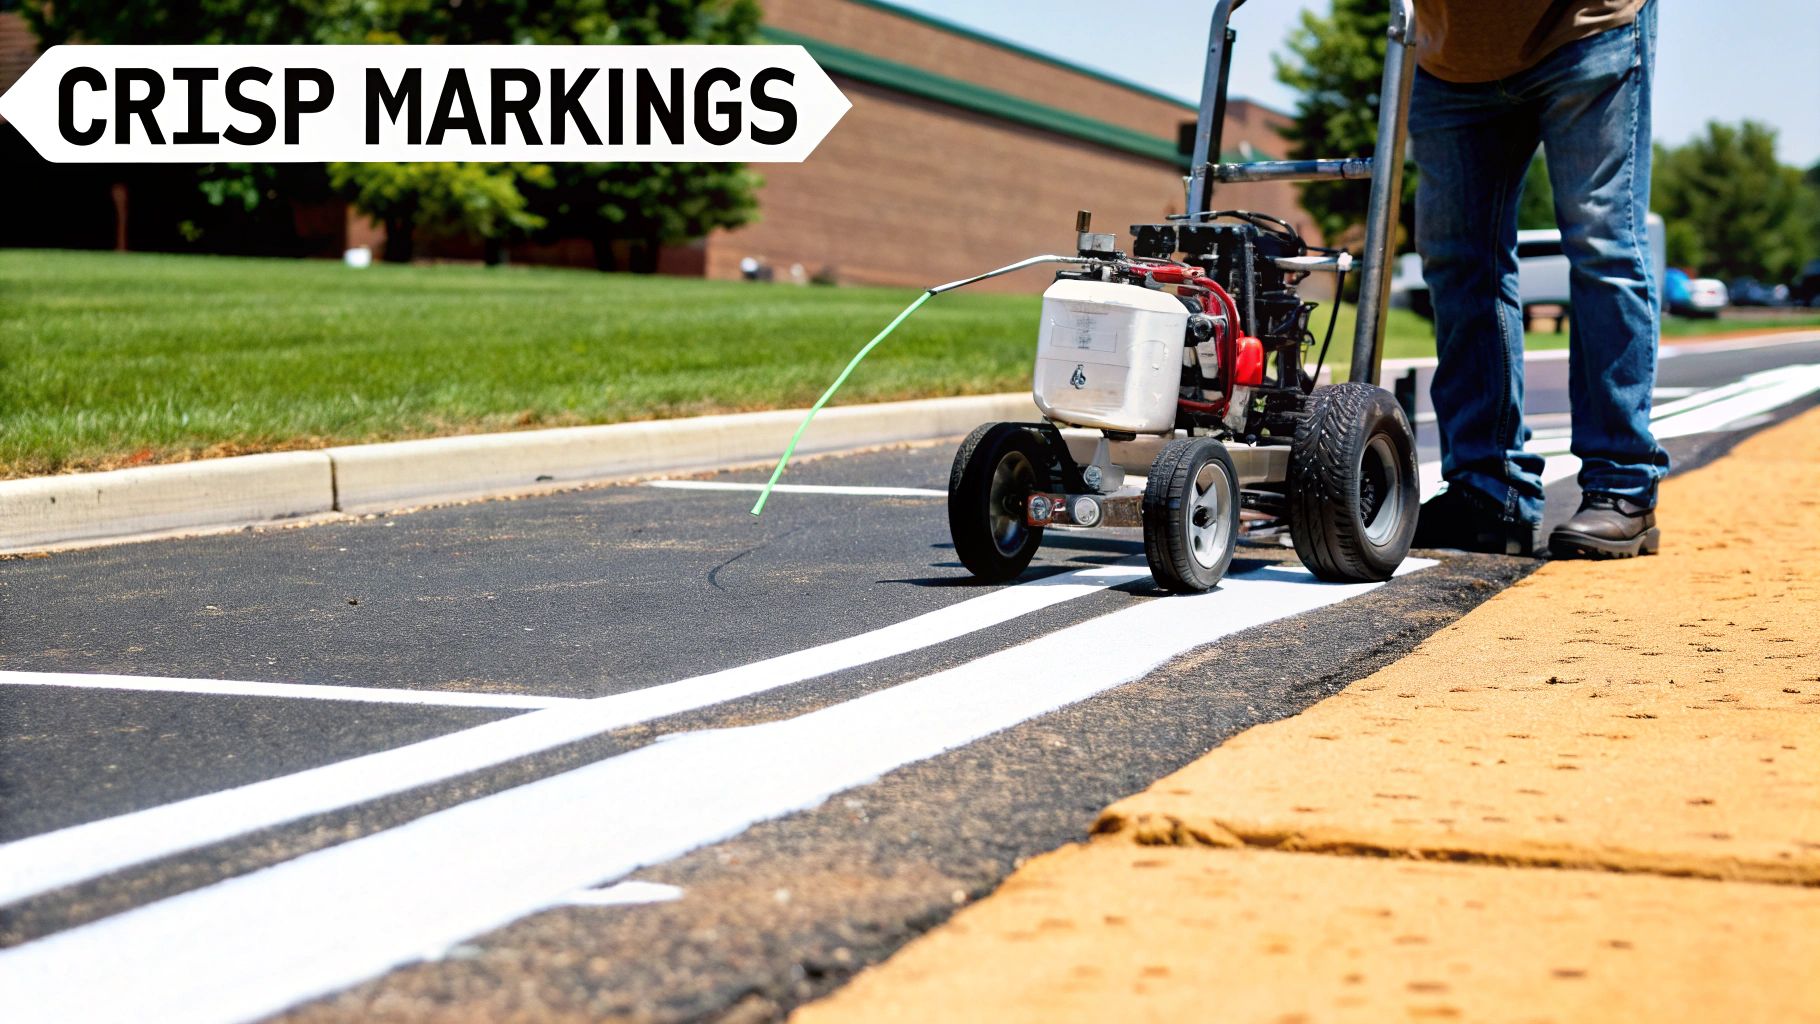
Applying Crisp, Professional Markings
You've done the hard prep work, your layout is locked in, and the surface is ready. Now comes the moment of truth: laying down the paint. This is where your planning and precision pay off, transforming a blank slate into a functional, professional-looking parking lot.
There's a world of difference between a job that just "gets it done" and one that looks truly professional. Wavy lines, blurry stencils, and uneven paint coverage are the tell-tale signs of inexperience. Let's walk through the techniques the pros use to get those sharp, durable markings that stand out.
Guiding Your Lines
Never, ever try to freehand your lines. It's the fastest way to get a wavy, unprofessional result that you'll have to live with until the next re-stripe. The industry standard is simple but incredibly effective: a chalk line.
Using the measurements from your scaled diagram, pull the chalk line taut between your starting and ending points and give it a firm snap. You'll be left with a perfectly straight, temporary guide on the pavement. This is the path you'll follow with your striping machine. For those new to the craft, some even attach a laser guide to their striper, which projects a beam onto the ground for an extra layer of confidence.
Mastering the Line Striping Machine
A line striper looks simple to operate, but getting a uniform paint application is a skill. The most critical element? Maintaining a consistent walking speed.
Walk too fast, and your paint will be thin, leading to poor visibility and a short lifespan. Go too slow, and you'll lay down a thick, gloppy line that takes ages to dry and is prone to peeling. You have to find a steady, comfortable pace and lock it in for every single line.
Another key technique is perfecting your starts and stops. You want sharp, squared-off ends, not messy, rounded blobs. To do this, start walking the machine a split second before you pull the trigger to spray. Likewise, release the trigger just before you come to a complete stop. This "feathering" technique makes all the difference in achieving a clean, professional finish.
The sweet spot for paint thickness is generally around 15 mils. This gives you the best combination of durability and reasonable drying time. Hitting that target consistently across an entire lot comes down to a steady hand, a consistent pace, and a properly pressurized machine.
Nailing the Stencil Work
From ADA symbols to directional arrows, stencils are non-negotiable. The biggest enemy here is paint bleed—that fuzzy, messy look you get when paint seeps under the stencil's edges.
Getting crisp, bleed-free results isn't luck; it's technique.
- Secure the Stencil: First, make sure the stencil is sitting perfectly flat against the pavement. Use weights or even a spare hand (or foot) to hold it down, especially if there's any wind.
- Apply a Light Tack Coat: Don't just blast it with a heavy coat of paint. Start with a very light mist. This "tack coat" dries almost instantly and effectively seals the stencil's edges to the pavement.
- Build with Full Coats: Once the tack coat is down, you can apply one or two more even coats to get that solid, vibrant color. Always spray straight down, not at an angle. Angled spraying is what forces paint under the edges.
- Lift Cleanly: When you're finished, lift the stencil straight up, being careful not to drag it and smudge your perfect work.
This methodical approach is what separates a top-tier job from an average one. It’s this kind of attention to detail that ensures your lot is not just compliant but also projects an image of quality and care.
Curing, Cleanup, and Long-Term Care
So, the last line is painted and the stencils are packed up. It feels like the job is done, but hold on—this final phase is what makes the whole project last. Skipping the curing, cleanup, and maintenance steps is like running a marathon and stopping a few feet from the finish line. It undermines all your hard work.
First things first: secure the area. Get those cones, caution tape, or barricades up immediately. The last thing you need is some impatient driver leaving tire tracks through your wet paint, forcing you back out for frustrating touch-ups.
The Critical Curing Window
Paint might feel dry to the touch in less than an hour, especially on a warm, dry day, but it's nowhere near fully cured. Curing is a chemical process where the paint film hardens all the way through, giving it the durability to stand up to traffic. This takes way longer than just drying.
Letting cars drive over the lines too soon is one of the most common ways a perfect striping job gets ruined. A solid rule of thumb is to keep all traffic off the new lines for at least 4 to 8 hours. If it's cool or humid, you'll want to extend that time considerably. A cured line is tough; a line that's just dry on the surface can still be easily scarred.
A professional striping job isn't just about laying down paint; it's about protecting that paint until it's ready. Patience during the curing phase is absolutely non-negotiable if you want a long-lasting finish.
Smart Equipment Cleanup
While the paint is curing, it's the perfect time to clean your equipment. This isn't just a chore—it’s how you protect your investment. Dried paint will permanently clog the hoses, pump, and spray tips of a line striping machine, leading to expensive repairs.
Get into this routine as soon as you finish painting:
- Empty the Machine: Run any leftover paint back into its bucket.
- Flush the System: For water-based paints, cycle clean water through the machine until it runs completely clear. If you used solvent-based paint, you'll need the right cleaning solvent, like mineral spirits, to do the job.
- Clean Your Gear: Scrape any built-up paint off your stencils and give them a good scrub. Soak the spray tips in the proper cleaning solution to dissolve any residue that could mess up your spray pattern on the next job.
This simple process keeps your gear in top shape and ready to go when you need it.
Planning for the Future: Maintenance and Re-Striping
Knowing how to stripe a lot also means knowing when it needs to be done again. A proactive maintenance plan keeps a property safe, compliant, and looking sharp. Once lines get faded, cracked, or confusing, they can become a serious safety hazard and a liability.
Most commercial lots need to be re-striped every 18 to 36 months. The exact timing really boils down to two things:
- Traffic Volume: A busy retail center will burn through paint much faster than a quiet office park.
- Sun Exposure: The intense Texas sun we get here in Houston is brutal on paint, causing it to fade much more quickly.
Regular maintenance is a huge part of the overall parking management industry. The global market for parking management was valued around USD 4.84 billion in 2024 and is set to grow as more facilities recognize the need for clear, enforceable markings. You can learn more by checking out research on current parking management trends.
The best move is to set a recurring calendar reminder for an annual walk-through. If your lines are looking tired, it's time to get a re-stripe on the schedule. If you need a hand developing a maintenance plan for your property, our team can offer expert advice. Feel free to contact us at Houston Parking Lot Striping to talk it over.
Common Questions We Hear in the Field
Even with the best plans, you're going to have questions. Over the years, we've heard them all from property managers, contractors, and business owners trying to get their parking lot striping projects off the ground. Getting straight answers to these common questions is the key to making sure your project goes off without a hitch.
Think of this as your quick-reference guide. We’ll get into the real-world answers on everything from budgeting and scheduling to the specifics of paint and compliance. Our goal is to give you the confidence to plan your next project like a pro.
What’s the Real Cost of Parking Lot Striping?
This is almost always the first question, and the honest answer is: it depends. The cost to stripe a parking lot isn't a simple flat rate. It comes down to a few major variables: the total square footage, the number of stalls, and how complex the markings are. Simple lines are one thing; ADA stencils, directional arrows, and fire lane lettering all add to the scope.
A simple re-stripe over existing, faded lines is your most straightforward, budget-friendly option. On the other hand, laying out a brand-new lot on fresh asphalt or a recently sealcoated surface will be a bigger investment. That's because it involves a ton of prep work—measuring, chalking, and snapping every single line from scratch.
When you get a quote, it will likely be broken down in one of these ways:
- Per linear foot for the straight lines.
- Per stencil for things like ADA symbols or "NO PARKING" text.
- A lump sum for the whole job, especially for new layouts.
The only way to nail down a budget is to get a detailed quote from a professional who has walked your specific property.
How Long Does This Paint Actually Take to Dry?
Dry time is the big one for scheduling because it tells you exactly how long you need to shut down your lot. It’s a moving target, heavily influenced by the type of paint we use, the temperature, and—most importantly—the humidity.
On a warm, dry day, a good water-based acrylic paint can feel dry to the touch in less than an hour. But "dry to the touch" isn't the same as "ready for traffic." The paint needs to fully cure, which is the process of hardening completely so it can stand up to thousands of pounds of rolling steel.
As a rule of thumb from our experience, we always recommend keeping vehicles off a newly striped lot for at least 4 to 8 hours. This is the best way to prevent ugly tire marks, smudges, and smeared lines. Your striping crew will give you the most accurate time based on the weather conditions that day.
What are the Most Common (and Costly) Mistakes?
We've been called in to fix a lot of striping jobs over the years, and a few common mistakes pop up again and again. The biggest culprits are almost always poor surface prep, sloppy measurements, and failing to follow ADA regulations.
Skipping a thorough surface cleaning is a fatal error. Paint just won’t stick to dirt, oil, or grime, and it’s guaranteed to peel prematurely. Getting the stall dimensions wrong is another one—it frustrates drivers and wastes valuable space.
But the most serious mistake by far is messing up the ADA or local fire lane codes. This isn't just a cosmetic issue; it can lead to hefty fines and even open you up to liability lawsuits. Working with an experienced crew that lives and breathes these local and federal rules is the only way to be sure you're covered.
How Often Should I Plan on Re-Striping?
Parking lot striping isn't a one-and-done deal; it’s a critical piece of your ongoing property maintenance schedule. For a typical commercial lot around Houston—with our heavy sun and steady traffic—you should budget for a re-stripe every 18 to 36 months.
Faded, cracked, and peeling lines are more than just an eyesore. They confuse drivers, increase the risk of accidents, and can put your property out of compliance with safety and accessibility laws.
Staying on top of your striping schedule pays off in a few key ways:
- Safety: Clear lines, crosswalks, and arrows keep traffic moving predictably.
- Compliance: You stay on the right side of ADA and fire codes, avoiding fines.
- Curb Appeal: A crisp, freshly striped lot tells customers and tenants you care about your property.
A good practice is to do a quick walk-through of your lot once a year. It's the easiest way to gauge the condition of your lines and decide if it's time for a refresh.
When you need the job done right, with precision, on schedule, and in full compliance with all regulations, trust the experts. Houston Parking Lot Striping has over 15 years of experience delivering clean, durable results for property managers and general contractors across the region. Get your free, no-obligation estimate today!
Article created using Outrank