

How to Stripe a Parking Lot The Definitive Houston Guide
Before you even think about firing up the striping machine, you have to get the planning right. This is where a job is made or broken. A sharp, well-planned lot comes down to assessing the surface, nailing the layout for traffic flow, and making sure everything is up to code before a drop of paint hits the pavement. Skipping this part is the fastest way to a costly do-over. Properly executed parking lot striping not only improves the aesthetic appeal of your property but also ensures safety and maximizes parking efficiency, making it a critical aspect of commercial property management.
Your Blueprint for a Flawless Parking Lot Layout
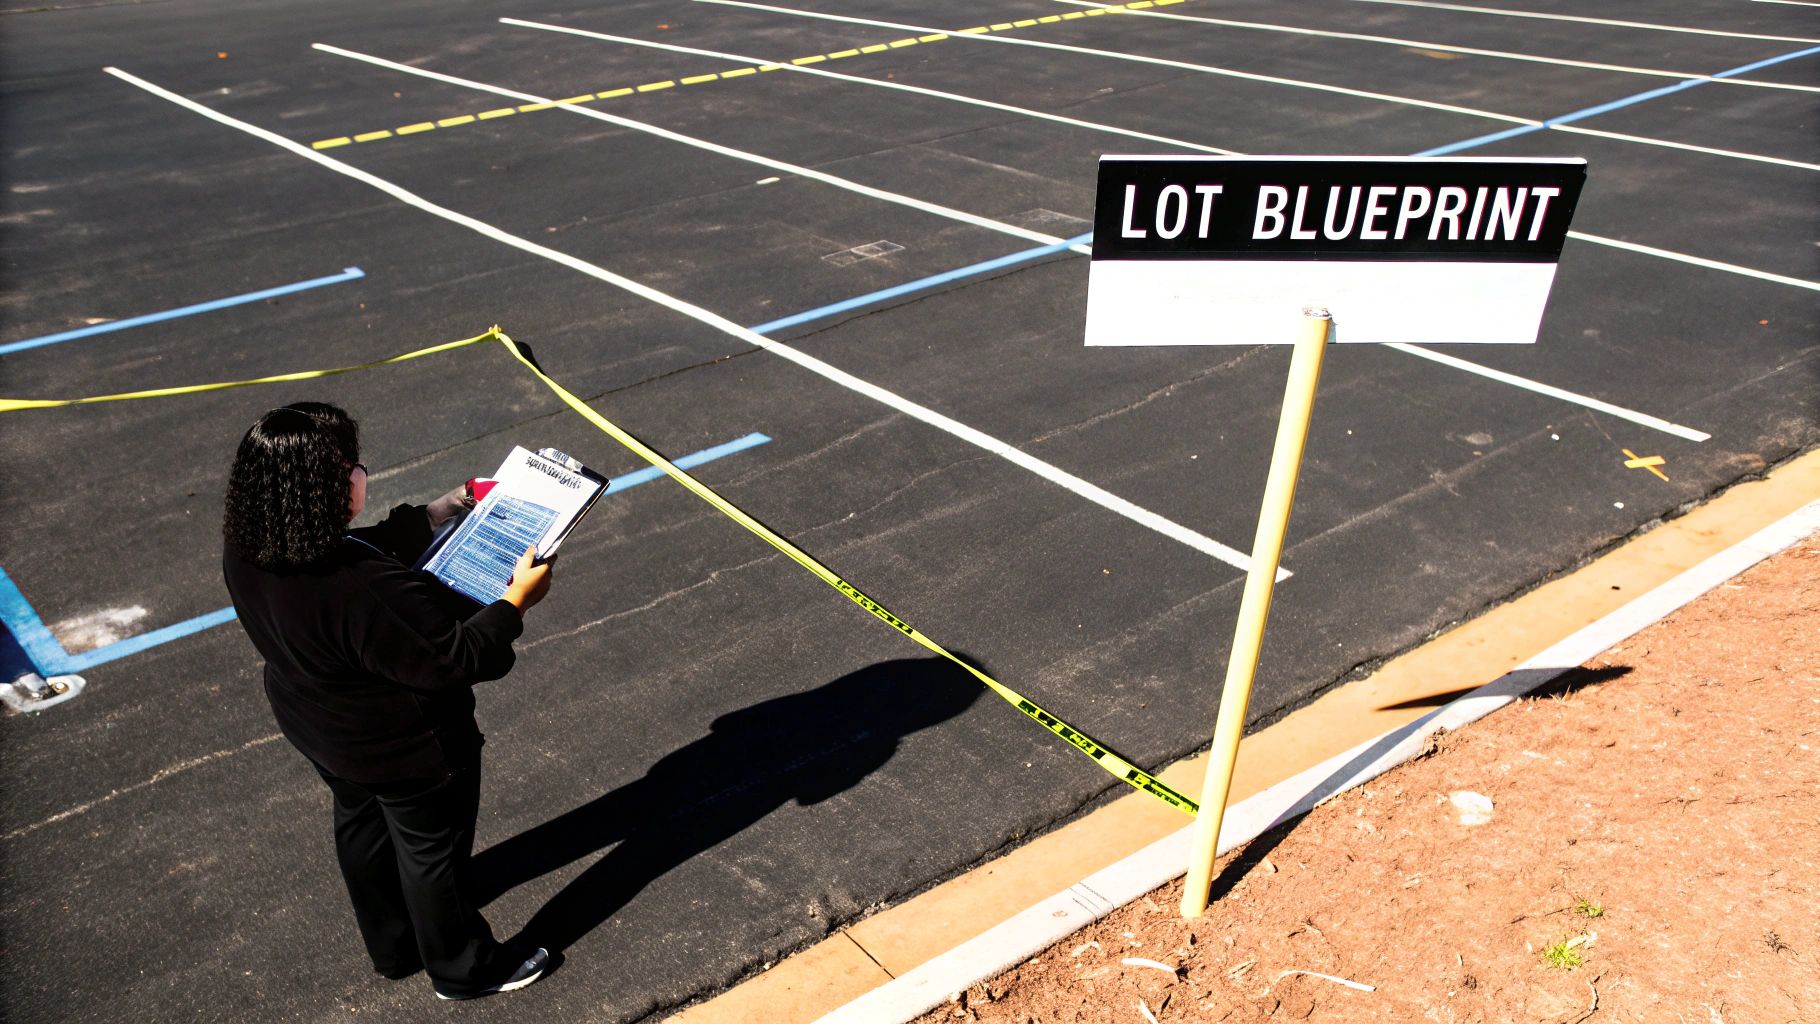
Think of this first phase as drawing up a detailed blueprint. A smart layout isn't just about looks; it dictates how people drive, where they walk, and the overall experience they have at your property. It's all about safety and efficiency.
Rushing the planning stage is a recipe for disaster—you end up with crooked lines, wasted space, and maybe even a visit from a code enforcement officer. Taking the time to properly map everything out is the single most important thing you can do to get a professional result that actually adds value to your Houston commercial property. A meticulously planned layout can significantly enhance the user experience for visitors and tenants alike, reflecting positively on your business.
Start With a Thorough Site Assessment
Every good striping job I've ever done started with a walk-through. You have to get eyes on the asphalt and see what you're really working with. If you just paint over a bad surface, the new paint will fail, simple as that. The integrity of the pavement surface is paramount for long-lasting results.
During your assessment, keep an eye out for these common troublemakers:
- Alligator Cracking: This is that web of interconnected cracks that looks like reptile skin. It’s a dead giveaway that the sub-base is failing, and it absolutely must be repaired before you even think about striping. Painting over this will just mask a deeper structural issue.
- Poor Drainage: Look for spots where water pools after it rains. Standing water is the enemy of both asphalt and paint, causing them to break down way faster than they should. Proper drainage solutions may need to be implemented first.
- Oil and Gas Stains: Those dark spots from vehicle fluids will repel paint like nobody's business. You have to get them cleaned and properly primed, or your new lines will peel right off, often within a few weeks.
- Faded or Flaking Lines: Check out the condition of the old stripes. If the paint is peeling up, you'll likely need to remove it to give the new coat a clean surface to grab onto. This might involve grinding or pressure washing.
Ignoring these problems is like building a house on a shaky foundation. Deal with them first, and your new stripes will have a solid base to bond to, lasting years longer. This initial investment in surface repair pays dividends in the longevity of your striping work.
Key Takeaway: A pristine striping job can't fix a failing surface. Proper surface preparation is non-negotiable for a durable and professional finish. Addressing cracks, stains, and drainage issues beforehand saves you from costly re-striping projects later on.
Designing the Optimal Layout
Once you're confident the surface is good to go, it's time to design the layout. This is more art than science sometimes. You're trying to maximize the number of stalls without making the lot feel cramped or unsafe. The first step is simple: measure the total square footage you have to work with.
From there, you can start sketching out the configuration. Think about the flow. Where do cars enter and exit? How will people walk from their cars to the building? A good layout guides drivers intuitively from the entrance to a parking spot and back out again. This logical flow is crucial for preventing congestion and accidents.
The design also has to be functional. Nobody wants to deal with stalls that are too narrow or too short. Inconsistent spacing leads to door dings, difficult maneuvering, and frustrated customers. A well-designed lot enhances the overall customer experience at your property.
Standard Parking Stall Dimensions
Sticking to industry-standard dimensions is the best way to create a lot that just works. While specific City of Houston or Harris County ordinances can apply, these general guidelines are a solid place to start. Always verify local regulations before finalizing your plan.
- Standard Stalls: The go-to size for most commercial lots is 9 feet wide by 18 feet long. This comfortably fits the majority of cars, trucks, and SUVs on the road today.
- Angled Stalls: Setting spaces at a 45, 60, or 75-degree angle can make parking much easier for drivers, especially in tighter lots. The stalls are still 9 feet wide, but the painted line length will change depending on the angle you choose.
- Compact Stalls: You still see these in some older lots, usually measuring around 8 feet wide. Honestly, with how big vehicles are now, I usually advise clients to stick with the standard 9-foot width to avoid problems.
In the end, it’s all about finding that sweet spot between the total stall count and a comfortable, safe experience for your tenants and customers. This balance is key to a successful parking lot design that serves its purpose effectively.
Choosing the Right Striping Materials and Equipment
Here's where the rubber meets the road, quite literally. The longevity and visibility of your parking lot lines come down to two things: the quality of your paint and the precision of your equipment. This isn't just a minor detail—it's the decision that determines how your investment holds up under the relentless Houston sun and our signature surprise downpours.
It’s tempting to save a few dollars upfront with cheaper paint, but that’s a classic mistake I’ve seen cost property managers dearly. Low-quality paint fades fast, cracks under thermal stress, and will have you calling a crew back out for a re-stripe far too soon. The right paint, applied with professional-grade tools, is what ensures your lines stay crisp, bright, and compliant for years, not just months.
The global market for traffic marking coatings was valued at USD 5,485.2 million in 2023 for a reason—this stuff matters. For anyone managing a large commercial property in Houston, high-performance coatings are a direct investment in safety. It's been shown that clear, visible markings can slash nighttime accidents by 25-40%. You can dig deeper into these trends and their safety implications over at Grand View Research.
Selecting the Best Traffic Paint for Houston Weather
Not all paint can handle a Houston summer. The combination of intense UV exposure, suffocating humidity, and torrential rain requires a product specifically engineered to last. Your choice will almost always fall into one of three categories, and picking the right one is crucial for achieving a durable and long-lasting finish that can withstand the local climate.
I've put together this quick comparison to help you understand the options and why one is typically the clear winner for our local climate.
Traffic Paint Comparison for the Houston Climate
| Paint Type | Best For | Durability | Dry Time | Houston Suitability |
|---|---|---|---|---|
| Water-Based Acrylic | Most parking lots, restripes on asphalt & concrete | Good (1-2 years) | Fast (under 30 mins) | Excellent. Fast-drying is key in our humidity. It's durable, eco-friendly, and the best all-around choice. |
| Solvent-Based (Oil) | Cooler weather applications, oily surfaces | Very Good (2-3 years) | Slow (several hours) | Poor. The long dry time is a dealbreaker in our humid, unpredictable weather. Higher VOCs are also a concern. |
| Thermoplastic | High-traffic zones (crosswalks, stop bars, arrows) | Exceptional (5+ years) | Very Fast (minutes) | Best for specific areas. It's overkill for standard stalls but unmatched for critical markings that see heavy wear. |
For the vast majority of parking lot jobs in and around Houston, a high-quality, 100% acrylic water-based paint is the smartest choice. It strikes the perfect balance of durability, quick cure time, and environmental responsibility needed to get the job done right in our climate.
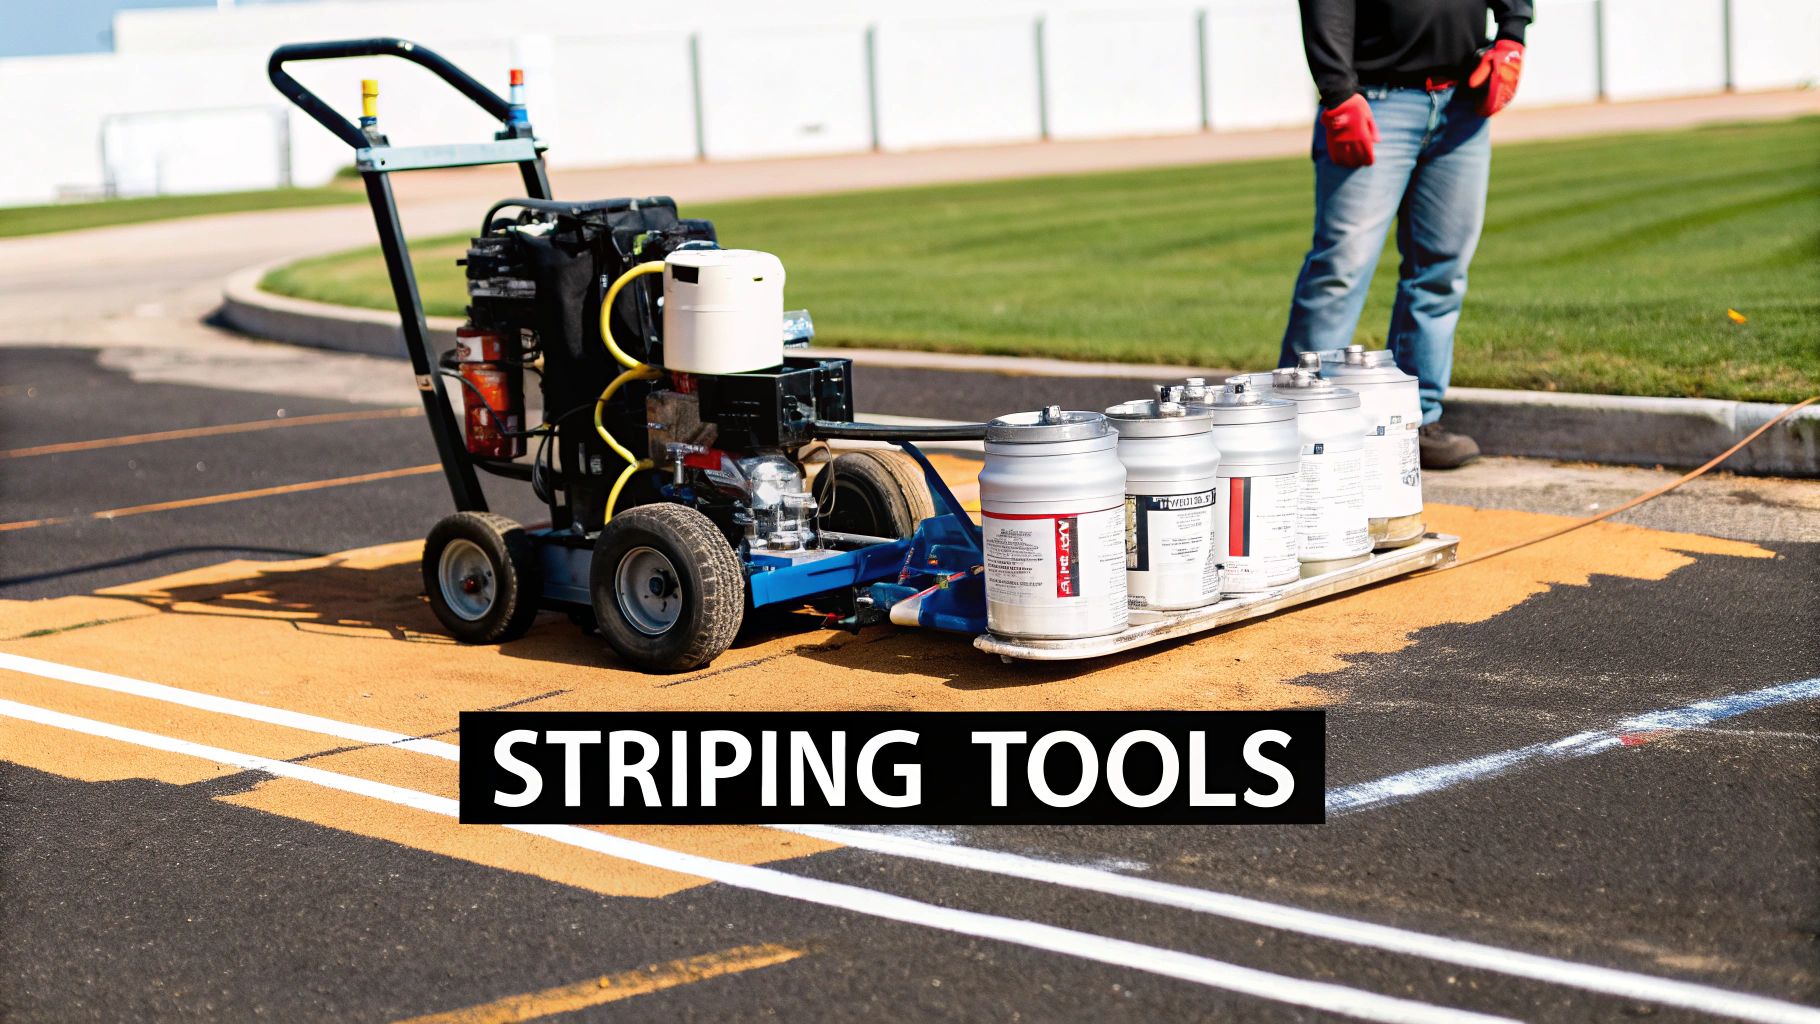
Essential Equipment for a Professional Finish
The best paint in the world won't look good if it's applied poorly. While you could technically use a roller and a string line, professional equipment is what delivers those clean, uniform results that project a well-maintained and safe property.
At the center of any striping operation is a professional walk-behind striping machine. These aren't just paint sprayers; they are precision tools that use an airless system to apply a perfectly consistent, sharp 4-inch-wide line. They turn what would be a back-breaking job into an efficient, repeatable process.
Beyond the striper itself, a professional's truck will always have these key items:
- Stencils: A full set for ADA symbols, fire lane lettering, directional arrows, and numbered stalls is non-negotiable. Using high-quality, durable stencils ensures markings are clear and uniform.
- Measuring Tools: You can't eyeball a layout. A long measuring tape (100-300 ft), a chalk line reel, and a layout protractor are essential for accuracy.
- Surface Prep Gear: Clean pavement is a must. At a minimum, this means a power washer or a heavy-duty broom to ensure the paint adheres properly. For more stubborn debris or old paint, a power grinder might be necessary.
Key Takeaway: The quality of your equipment directly translates to the quality of your work. Investing in a reliable striping machine like a Graco LineLazer and durable stencils pays for itself by delivering crisp, compliant markings that enhance both the safety and curb appeal of your property.
Putting Paint to Pavement: The Striping Process
Alright, the planning is done and you've got your materials ready to go. Now comes the part where the magic happens—turning that blueprint into crisp, clean lines on the asphalt. This is where a steady hand and a methodical approach separate a professional job from a weekend project.
This isn't just about spraying paint. It’s a deliberate process. From prepping the surface to laying down the final stencil, each step builds on the last. Get it right, and you’ll have a safe, organized, and sharp-looking lot that lasts. Executing these steps with precision is vital for the final outcome.
It All Starts with Surface Prep
I can't stress this enough: if you skip proper surface preparation, you're wasting your time and money. This is the single biggest reason striping jobs fail. Paint needs a clean, dry, and stable surface to grab onto. Without it, you're guaranteed to see peeling and fading way sooner than you should.
Power washing is non-negotiable. Asphalt collects a nasty film of dirt, oil, and grime that actively pushes paint away. A high-pressure wash is the only way to blast through that layer and open up the pores of the pavement, giving the new paint a solid foundation to bond with.
Think of it like painting a wall in your house. You wouldn't just slap a new coat over years of grime, right? Same principle here, but your work will have to stand up to car tires and Houston's weather.
Snap Those Chalk Lines
Once the lot is bone-dry, it's time to bring your layout to life on the pavement. This is where precision really counts. We use chalk lines to create perfectly straight guides for every single stripe. This critical step ensures that all lines are parallel and stalls are uniform in size.
You’ll use a chalk line reel to snap guidelines for where each stall line starts and stops, the edges of your crosswalks, and the placement of directional arrows. This simple tool is the secret to getting that uniform, geometric look that signals a job well done. It takes the guesswork out of the equation and keeps you from ending up with the wavy, crooked lines that make a property look neglected.
A freshly striped lot is a direct reflection of your property's management. Crooked lines suggest neglect, while straight, crisp markings communicate a commitment to safety, order, and quality.
Mastering the Striping Machine
A line striping machine might look easy to use, but getting clean edges and a consistent line width takes a feel for it. These machines are the heart of the operation, delivering a precise, even coat of paint that you could never get with a roller. The demand for this kind of precision is growing; the global pavement striping machine market was valued at $4.1 billion in 2024 and is projected to hit $7.3 billion by 2033. This is largely because safety regulations keep getting stricter about clear markings. You can read more about these equipment trends and their market impact.
The key is a steady walking pace. Go too fast, and your line will be thin and weak. Go too slow, and paint will pool and bleed under the edges. Consistency is everything. Most professional stripers have a locking front wheel, which is a lifesaver for keeping a perfectly straight path right on your chalk line.
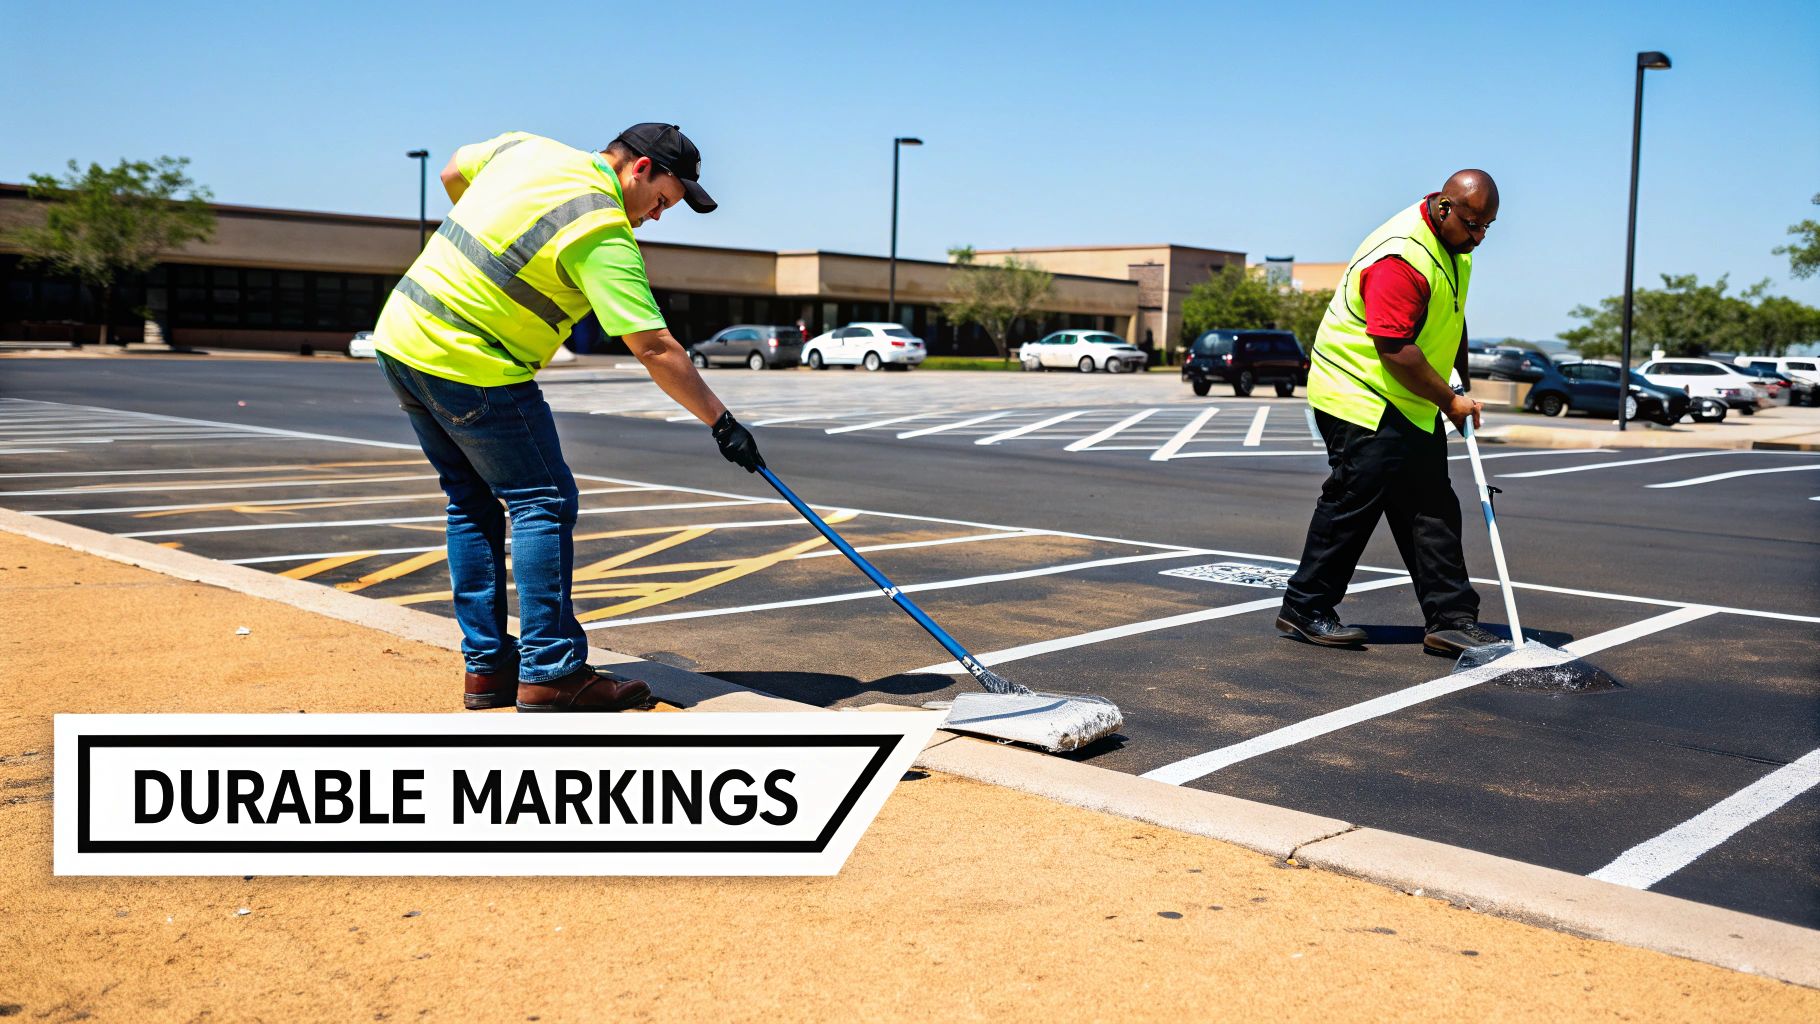
Applying Stencils for Clear Communication
The final touch is laying down the stencils that tell people what to do—ADA symbols, fire lane warnings, directional arrows, and "RESERVED" spots. These markings are essential for directing traffic and ensuring compliance with regulations.
Getting the stencils right is crucial for both clarity and compliance.
- Positioning is Key: Place the stencil exactly where your layout dictates. For ADA stalls, this means dead center in the space.
- Fight Overspray: Always use a spray shield or a big piece of cardboard to block overspray. Nothing looks sloppier than a fuzzy haze of paint around a crisp symbol.
- Light Coats are Better: Apply paint in a couple of light, even coats instead of one thick one. This stops the paint from seeping under the stencil and blurring the edges.
- The Lift-Off: When you're done spraying, lift the stencil straight up. Don't drag it. This small move is the difference between a sharp marking and a smudged mess.
By following this process—prep, measure, spray, and stencil—you’re setting yourself up for a flawless finish that looks great, lasts long, and keeps your property safe and compliant.
Navigating ADA and Fire Lane Compliance in Houston
When you're striping a parking lot, getting compliance right isn't just a good idea—it's the law. Around here in Greater Houston, a single mistake with the Americans with Disabilities Act (ADA) or fire lane rules can bring a world of hurt: hefty fines, legal trouble, and a demand for expensive, immediate fixes. Trust me, you want to get these critical markings right the first time.
Think of these regulations less as red tape and more as essential safety protocols. They ensure that everyone, from a person with a disability to a first responder in an emergency, can navigate your property safely and efficiently. For any property manager, mastering these local and federal rules is a non-negotiable part of the job.
It all starts with a solid foundation. This simple decision tree shows that before you even think about layout or compliance, the surface has to be ready.
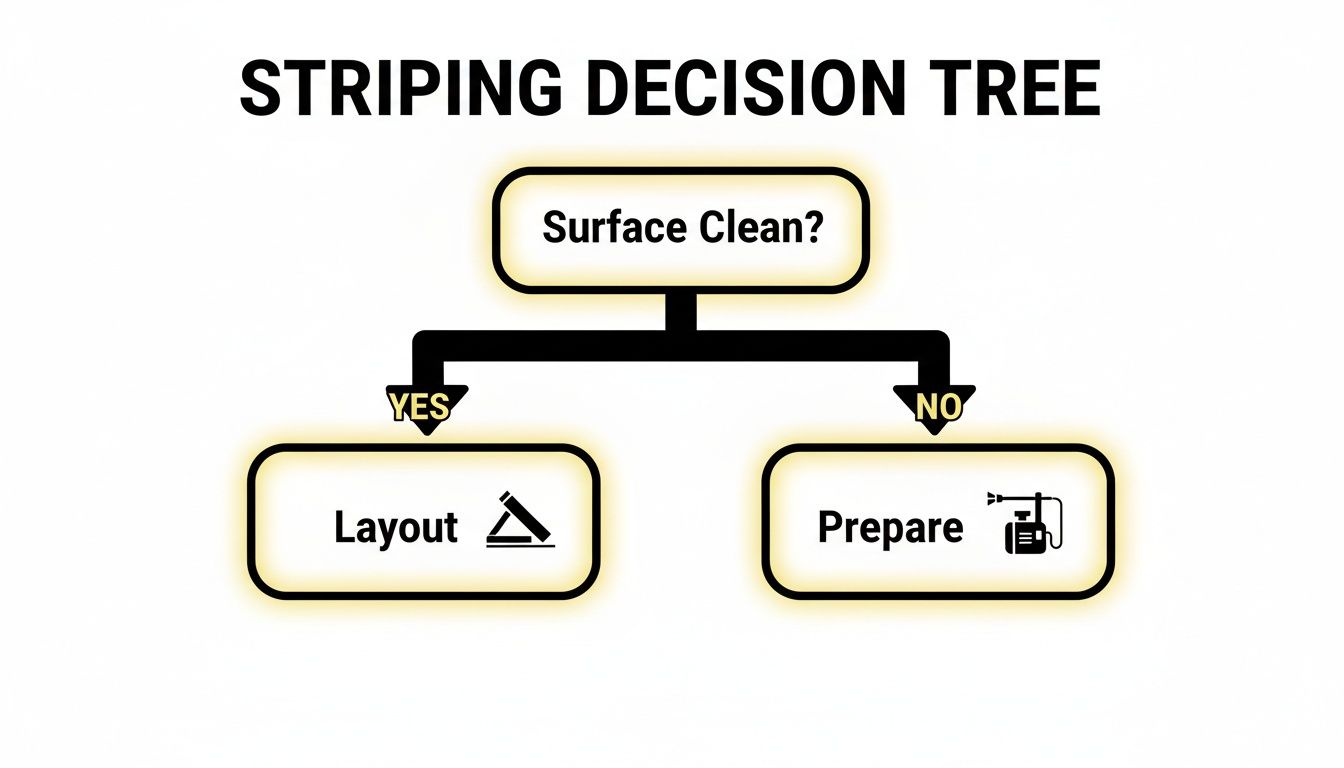
Without proper prep work, even a perfectly compliant layout will fade and fail. That leads to ambiguity, which is the last thing you want when it comes to safety and accessibility. A poorly maintained, non-compliant lot can be a significant liability.
Understanding ADA Stall Requirements
The ADA isn't just about providing parking; it's a civil rights law guaranteeing access. The specifications are precise, and there's no room for interpretation. The very first step is figuring out how many accessible stalls you actually need, which is based on your lot's total capacity.
Here’s the breakdown for most commercial lots:
- 1 to 25 total spaces: You need 1 van-accessible space.
- 26 to 50 total spaces: You need 2 accessible spaces total, and at least one must be van-accessible.
- 51 to 75 total spaces: That number goes up to 3 accessible spaces.
- 76 to 100 total spaces: You'll need 4 accessible spaces.
The formula continues to scale up from there. The golden rule is that one of every six accessible spaces must be designated as van-accessible, which comes with its own larger dimensions. For a more detailed breakdown, you can find more on our posts covering local ADA compliance.
Dimensions and Signage for Accessible Parking
Once you have the count, the dimensions are just as strict. A standard accessible stall must be a minimum of 96 inches (8 feet) wide. It has to sit directly next to a striped access aisle, which gives people room to maneuver.
That access aisle needs to be at least 60 inches (5 feet) wide. If it’s for a van-accessible spot, the aisle has to be 96 inches (8 feet) wide to provide enough clearance for a wheelchair lift.
Crucial Insight: An incorrectly striped access aisle is one of the most common mistakes we see. This space must be clearly marked to prevent anyone from parking in it, and it needs to lead directly to an accessible path to the building. We always use diagonal lines or chevrons to make it unmistakable.
Finally, you have to post the right signs. Every accessible space needs the International Symbol of Accessibility, and the sign must be mounted high enough so the bottom edge is at least 60 inches off the ground.
Fire Lane Regulations in Houston
Fire lanes are another area where you can't afford to get it wrong. They give emergency vehicles the clear, unobstructed path they need to get to your building. Both the City of Houston and Harris County have specific, non-negotiable rules.
A fire lane requires a minimum unobstructed width of 24 feet. The curbs must be painted a specific shade of red, and you need to have 4-inch white block lettering that reads "FIRE LANE – NO PARKING" at regular intervals. The need for this level of precision is driving the growth of the global line striping machines market, which reached USD 1.88 billion in 2024. Clear markings are a mandate, as studies show faded lines can increase accident risks by up to 30%. You can discover more insights about the line striping machine market on businessresearchinsights.com.
Local fire marshals are serious about these markings. If they find an error, they can issue citations on the spot and demand an immediate, and often costly, correction. Keeping your fire lanes clearly marked and completely clear is a cornerstone of responsible property management.
Keeping Your Parking Lot Markings Looking Sharp
A freshly striped lot gives your property an instant facelift, but that crisp, professional look doesn't last forever. The real value isn't just in the initial paint job; it’s in making those bright lines endure. Without a solid maintenance plan, you’re just letting your investment get worn down by traffic, Texas weather, and time.
Protecting your markings goes beyond appearances. It’s about maintaining a safe, compliant environment and stopping minor wear before it turns into a full-blown—and expensive—restriping job. A few simple, routine habits can add serious longevity to your pavement markings. Proactive maintenance is always more cost-effective than reactive repairs.
Smart Habits for Longer-Lasting Lines
The same things that beat up your asphalt—UV rays, rain, and vehicle leaks—are constantly attacking your paint. Add the daily friction from tires, and it's a recipe for fading and chipping. The good news is that a consistent maintenance routine can slow this down dramatically.
Simple, regular upkeep is the best defense. Here’s what every property manager should be doing:
- Sweep it Clean: Dirt and gravel are basically sandpaper under vehicle tires, grinding away at your paint. Regular sweeping or using a blower gets rid of this abrasive grit and helps preserve your lines.
- Tackle Spills ASAP: Oil, gasoline, and antifreeze are nasty chemicals that will dissolve traffic paint. Cleaning spills as soon as you spot them stops them from eating through the paint’s bond with the asphalt.
- Manage Water Flow: Make sure your drains are clear and water isn't pooling. Standing water is a killer for both asphalt and paint, leading to cracks, peeling, and a much shorter lifespan for your striping.
Adopting these practices is like putting a protective shield around your investment, defending it from the daily abuse that every parking lot faces.
When to Re-Stripe a Busy Lot
Even the best-maintained paint job won't last forever. For a busy commercial property here in the Houston area, you should plan on re-striping every 18 to 24 months. This cycle keeps your markings bright and visible, ensuring you stay on the right side of ADA and fire code regulations.
A Pro's Take: One of the biggest mistakes I see is property managers waiting until the lines are nearly gone. Faded markings are a liability. They cause confusion, raise the risk of accidents, and can even get you fined. A regular re-striping schedule is a smart, cost-effective strategy for managing your property’s safety and curb appeal.
Other Services That Protect Your Investment
Think beyond the paint itself. A few complementary pavement services can create a much better foundation for the striping, which helps it last longer.
Sealcoating is probably the single most effective thing you can do. It adds a protective layer over the entire asphalt surface, guarding it against water, UV damage, and chemical spills. Not only does this extend the life of the pavement, but it also creates a rich, dark backdrop that makes new stripes pop and gives the paint a better surface to grip.
Between striping cycles, a good power washing can do wonders. It blasts away the deep-seated grime and ugly stains that sweeping leaves behind, instantly brightening up the whole lot and its markings. For more ideas, you can check out our articles on parking lot maintenance.
Answering Your Top Parking Lot Striping Questions
No matter how well you plan, there are always a few questions that pop up before the paint hits the pavement. As a team that’s striped countless lots across Houston, we’ve heard them all. Here are some of the most common ones we get from property managers.
How Long Does Parking Lot Paint Actually Take to Dry?
This is the big one, because it determines how long you need to block off sections of your lot. The answer really comes down to the paint, the temperature, and our good old Houston humidity.
-
Water-Based Paint: On a perfect day—warm, sunny, and low humidity—this paint can feel dry to the touch in as little as 30 minutes. But that’s just the surface. We always advise clients to wait at least 2 to 4 hours before letting cars drive on it. This gives the paint time to properly cure and prevents those frustrating tire tracks.
-
Oil-Based Paint: This stuff takes a lot longer to cure, sometimes a full day. Honestly, it's rarely a practical choice for most commercial projects in our climate, where getting the lot back in service quickly is key.
Bottom line: always double-check the manufacturer’s specs. They know their product best.
What’s the Best Time of Year for Striping in Houston?
Timing is everything if you want the job to last. You're looking for that sweet spot of warm, dry weather, which in Houston generally means sometime between spring and fall.
The real MVP here isn't the air temperature; it's the pavement temperature. The asphalt itself needs to be at least 50°F and rising for the paint to bond correctly. Just as important is keeping an eye on the forecast. If there’s even a chance of rain within 24 hours, it’s a no-go. A sudden downpour can completely wash away a fresh paint job.
Our Pro Tip: We always say that patience pays off. Trying to squeeze in a striping job during a stretch of iffy weather is the quickest way to end up paying for it twice.
Can You Just Paint Over the Old, Faded Lines?
Absolutely, and for most re-striping projects, that's exactly what we do. But there’s a huge "if" involved: the surface has to be perfectly clean. We’re talking zero dirt, no oil spots, and no flaking paint from the old lines.
If the existing lines are really peeling or chipped, just painting over them is a mistake. The new paint will just flake off with the old. In those cases, the right move is to remove the old markings first with grinding or water blasting. It gives you a clean canvas and a much stronger bond for the new paint.
How Much Does It Cost to Stripe a Parking Lot in Houston?
There's no simple, flat-rate answer for this. Pricing is almost always calculated per unit—either per linear foot for lines or per stencil for things like ADA symbols and directional arrows. For a deeper dive into all the variables, you can check out our guide on the average cost of a parking lot restripe.
Here in the Greater Houston area, a good ballpark figure is anywhere from $0.25 to $0.75 per linear foot. What pushes the price to the lower or higher end of that range? It comes down to the size of your lot, the condition of the asphalt, and the type of paint you choose. Larger projects often have a lower per-foot cost due to economies of scale.
Your property deserves sharp, compliant, and durable markings. The team at Houston Parking Lot Striping has the expertise to deliver a professional finish that enhances your property's safety and curb appeal. Visit us at https://houstonparkinglotstriping.com to get a free estimate for your project.