

A Guide to Effective Parking Lot Layout Design
A well-designed parking lot is more than just a place to leave a car; it's the first and last impression you make on a customer. Getting the layout right is a strategic move that balances vehicle capacity with safe, easy navigation. This initial blueprint is foundational, impacting everything from traffic flow and customer satisfaction to your long-term maintenance budget. A thoughtful parking lot layout design ensures every inch of your property is optimized for safety, efficiency, and accessibility, making it a critical component of any commercial property plan.
Laying the Groundwork: Your Parking Lot Blueprint
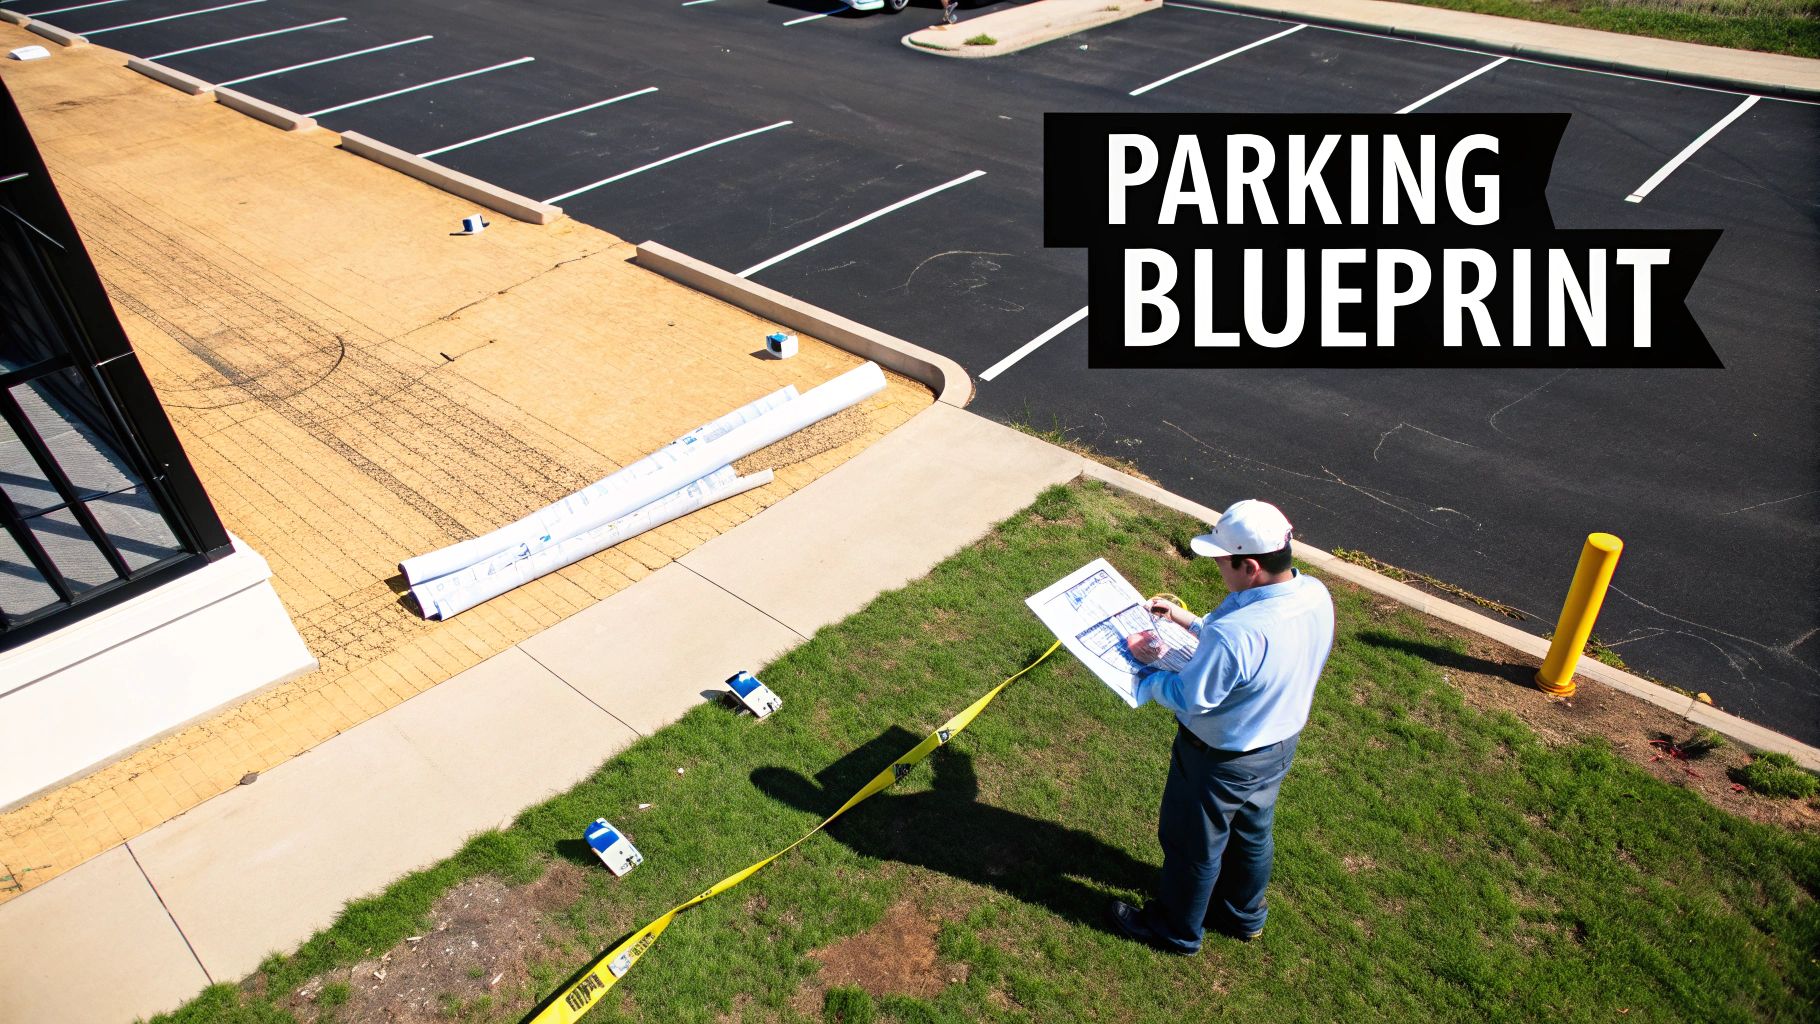
Before you even think about striping, you need to get out there and walk the property. A thorough site assessment is non-negotiable. This is where you ground your plan in reality, not just drop a generic template onto a unique piece of land. I've seen countless projects go sideways because this step was rushed—leading to frustrating bottlenecks, wasted space, and expensive redos.
Start by getting precise measurements of the entire area. You need to know your total square footage, locate every property boundary, and map out any unmovable objects. We're talking light poles, fire hydrants, utility boxes, landscaping features, and existing building footprints. At the same time, pinpoint every entry and exit point, as these are the anchors for your entire traffic circulation plan.
Charting the Course for Cars and People
Think like a driver and a pedestrian. How will people actually move through this space? You need to anticipate the natural path a vehicle will take from the street, through the lot to find a spot, and then back out again. For a busy Houston retail center, that means planning for the weekend rush and ensuring your main travel lanes don't turn into a gridlocked mess right in front of the store.
Pedestrian safety is just as critical. A functional blueprint must deliberately plan for people on foot. This means including:
- Dedicated walkways that provide a clear, safe path from parking areas to the entrance.
- High-visibility crosswalks at key traffic intersections where cars and people are most likely to meet.
- Smartly placed islands or medians, which are great for breaking up vast seas of asphalt and creating protected channels for pedestrians.
A layout that forces people to dodge cars is a serious liability and a poor user experience.
Getting the Stall Mix Right
One size definitely does not fit all when it comes to parking stalls. While the temptation is to cram in as many spaces as possible, the type of stalls you include is what makes a lot truly functional. Your plan has to account for standard vehicles, of course, but also for compact cars and, most importantly, all required ADA-accessible spaces.
The needs of your tenants or customers should drive this decision. A downtown office building could likely get away with more compact stalls. A grocery store, on the other hand, needs wider, standard-sized spaces for shoppers loading kids and groceries into SUVs and minivans.
A thoughtful parking lot layout is an asset that adds real value and improves the daily experience for everyone who uses it. A poorly planned one becomes a constant source of frustration and a long-term liability. Investing the time to get the blueprint right is the single best decision you can make.
The debate over parking angles isn't new. As cars became common in the early 20th century, angled spots were popular. But by the 1920s, engineers realized that angled parking could shrink a road's effective width by 20-25%. This insight triggered a major shift, and by the 1950s, many cities had banned it in favor of parallel designs to improve traffic flow. These historical lessons are still relevant today as you finalize a blueprint that will dictate every detail of your final parking lot striping plan.
Calculating Stall Capacity and Dimensions
Once you've mapped out the overall site, it's time to get down to the nitty-gritty: the math. This is where your high-level plan becomes a functional grid of stalls and aisles. It’s a classic balancing act—you need to maximize your parking capacity while giving drivers enough room to actually maneuver and park without a headache.
If you rush this part, you end up with a layout that looks great on the blueprints but is a nightmare in reality. We've all seen them: aisles too tight for a standard pickup truck, or stalls so narrow they practically guarantee door dings. Nailing these dimensions from the start is what separates a functional, valuable asset from a daily source of frustration.
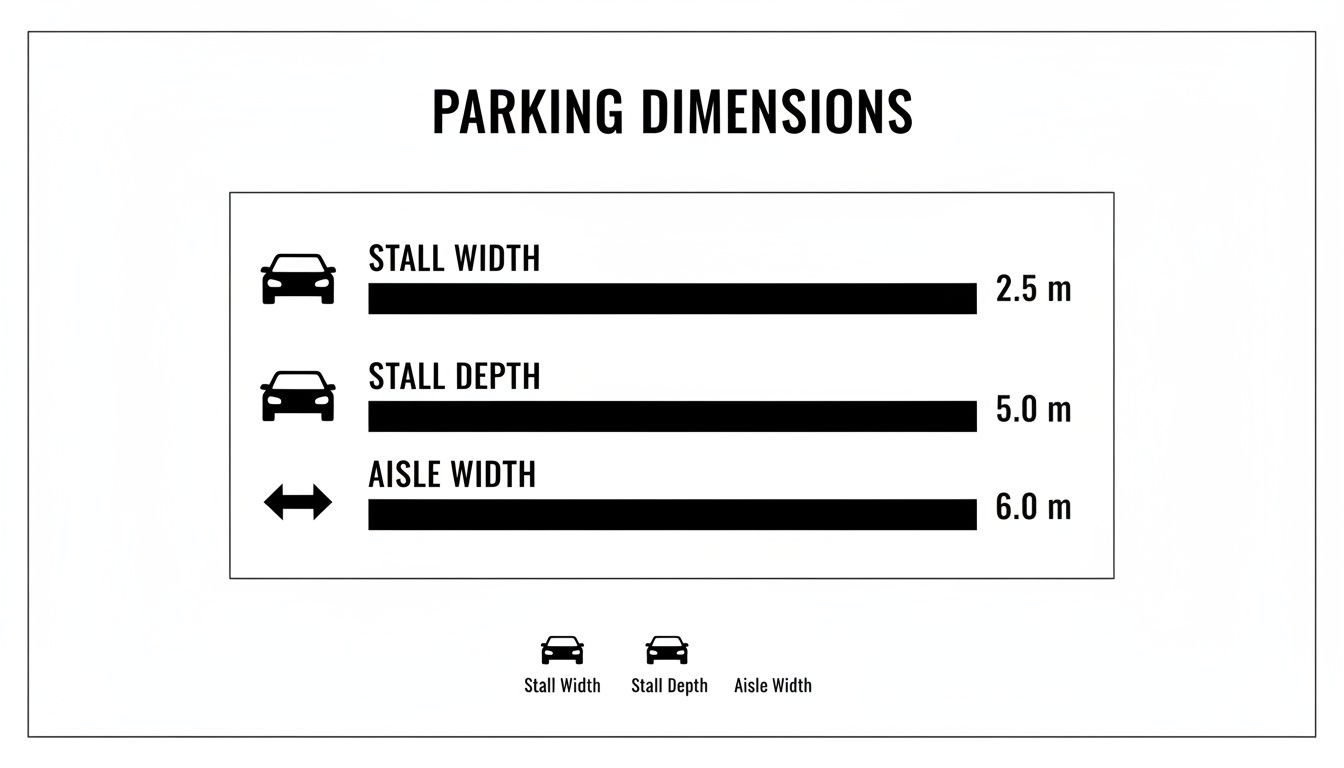
Defining Your Standard Stall and Aisle Widths
The building block for your entire lot is the "parking module"—a single row of stalls plus the drive aisle that serves it. While you always have to check local Houston-area codes, there are some well-established industry standards that are your best bet for a starting point.
For most commercial properties, your design will be built around these core measurements:
- Standard Parking Stall: The go-to dimension is 9 feet wide by 18 feet deep. This size is the sweet spot, comfortably fitting everything from a compact sedan to a full-size SUV.
- Compact Parking Stall: To squeeze in a few more spots, you can designate a percentage of stalls as "compact," usually measuring 8 feet wide by 16 feet deep. These work best in controlled environments like employee lots where you have a good idea of the vehicle mix.
- Perpendicular Aisle Width: When you're using 90-degree parking, the magic number for safe, two-way traffic is a 24-foot-wide aisle. This gives drivers plenty of room to back out and turn without cutting into the path of oncoming cars.
It can be tempting to shave a foot here or there to fit more cars, but I can tell you from experience, it’s almost always a mistake. Tighter aisles and stalls lead directly to more fender-benders, slower traffic, and unhappy customers or tenants.
The Trade-Offs of Angled Parking
While 90-degree (perpendicular) parking is the undisputed champion of space efficiency, it’s not always the right call. Angled parking—most commonly at 45, 60, or 75 degrees—can be a game-changer for traffic flow and ease of use. This is why you see it so often at retail centers where customer convenience is king.
The big difference is that angled parking is designed for one-way traffic, which creates a much more intuitive and safer path through the lot. Of course, that improved experience comes at a cost: total stall count. As you decrease the angle, the number of cars you can fit in a single row goes down.
The real goal isn't just jamming in the maximum number of cars. It's about creating a parking lot that is safe, efficient, and user-friendly. The angle you choose is a strategic decision that directly shapes that user experience.
A 60-degree angled layout, for instance, is often seen as the perfect middle ground. It maintains a pretty high stall density but only requires a one-way aisle of around 18 feet. Drivers find it significantly easier to pull in and out of these spaces, which speeds up parking turnover and cuts down on congestion during busy times. A 45-degree angle is even more forgiving but sacrifices more capacity, making it a better fit for long, narrow properties or odd-shaped parcels.
Standard Parking Stall and Aisle Dimensions
This table is a quick cheat sheet for how your parking angle impacts the aisle width you'll need. It's a fundamental part of the layout puzzle.
| Parking Angle | Stall Width | Stall Depth | One-Way Aisle Width | Two-Way Aisle Width |
|---|---|---|---|---|
| 90 Degrees | 9 feet | 18 feet | 22-24 feet | 24 feet |
| 75 Degrees | 9 feet | 18 feet | 20 feet | Not Recommended |
| 60 Degrees | 9 feet | 18 feet | 18 feet | Not Recommended |
| 45 Degrees | 9 feet | 18 feet | 14 feet | Not Recommended |
Ultimately, choosing the right angle comes down to your property’s goals. For a massive employee lot at a distribution center, maximizing every inch with a 90-degree layout is the logical choice. But for a bustling Houston shopping center, the smoother flow and better customer experience of a 60-degree design is a much smarter long-term investment.
Navigating ADA and Fire Lane Regulations
Once you have a handle on stall counts and angles, it's time to tackle the non-negotiable part of the job: compliance. Designing a parking lot isn't just about maximizing space. It’s about adhering to strict legal standards that ensure safety and accessibility for every single person who uses it.
Getting these regulations wrong is simply not an option. It can lead to hefty fines, failed inspections, and the painful, expensive process of grinding down and restriping a brand-new lot. The two major players here are the Americans with Disabilities Act (ADA) and local fire codes. Think of them as the foundational rules that will shape your final design from the very beginning.
Mastering ADA Compliance for Accessible Parking
The ADA is all about ensuring people with disabilities have safe and equal access to commercial properties. When it comes to your parking lot, this means very specific requirements for accessible stalls, the access aisles next to them, and the pathways leading to the building's entrance.
The number of accessible spaces you need isn't a suggestion; it's a calculation based on the total number of parking stalls in your lot.
Here's the breakdown you'll need to follow:
- 1 to 25 total spaces: 1 accessible space required.
- 26 to 50 total spaces: 2 accessible spaces required.
- 51 to 75 total spaces: 3 accessible spaces required.
- 101 to 150 total spaces: 5 accessible spaces required.
- Over 500 total spaces: 2% of the total spaces must be accessible.
On top of the count, for every six (or fraction of six) accessible spaces you provide, at least one must be van-accessible. These are wider to accommodate vehicles with ramps. A standard accessible space needs an 8-foot-wide stall with a 5-foot-wide access aisle beside it. A van-accessible space, however, requires that same 8-foot stall but with a wider, 8-foot access aisle.
Proper ADA compliance is about more than just avoiding fines. It's about creating a welcoming and genuinely usable space for all your customers or tenants. The details—from the slope of the pavement to the height of the signage—really matter.
Strategic Placement and Signage
It's not enough to just have the right number of stalls; they have to be in the right place. ADA guidelines are clear: accessible spaces must be located on the shortest accessible route to a building’s entrance. You can't just tuck them away in a forgotten corner. They need to be in the most convenient, accessible spots, which usually means right up front.
Signage is another critical piece of the puzzle. Every accessible space must be clearly identified with the International Symbol of Accessibility mounted on a sign. For those van-accessible spots, the sign must also include the phrase "Van-Accessible."
For a much deeper dive into the nitty-gritty, check out our guide on ADA handicap parking space requirements. It'll help you ensure every marking and sign is perfectly up to code.
Keeping Fire Lanes Clear and Compliant
While the ADA focuses on individual access, fire codes are all about giving emergency vehicles a clear, unobstructed path to your property. Here in Houston, the fire marshal is uncompromising when it comes to fire lane regulations, and for good reason. A blocked or improperly marked fire lane can delay emergency response and lead to serious penalties.
The geometry of your lot—the interplay of stall sizes, aisle widths, and angles—is the foundation here. While standard perpendicular stalls are often 9 feet wide by 18-20 feet deep, Houston fire codes are especially strict, demanding 24-foot-wide fire lanes. These regulations are enforced with absolute precision, and when you consider the 4.5 million U.S. crashes that happen in parking lots each year, it’s easy to see why.
Here’s what you absolutely must account for:
- Minimum Width: Fire lanes must be at least 24 feet wide to accommodate large fire trucks and other emergency vehicles.
- Clear Markings: They need to be clearly marked with paint and stenciling, which usually means red curbs and bold, white lettering that says "FIRE LANE" or "NO PARKING FIRE LANE."
- Unobstructed Access: Nothing can block any part of the fire lane—not parked cars, not dumpsters, not even poorly placed landscaping.
You have to integrate these fire lane requirements into your layout from day one. It often means sacrificing a few potential parking spots, but when it comes to public safety and legal compliance, it's completely non-negotiable.
Fine-Tuning Your Lot for Traffic Flow and Safety
A well-designed parking lot is more than just a place to store cars; it's a system designed to guide people and vehicles safely and efficiently. After you've nailed down the dimensions and compliance rules, the real art begins. This is where you shift from a static grid on paper to a dynamic, intuitive space that cuts down on risk and frustration.
A great layout feels effortless for the user, creating a seamless experience from the moment they pull in to the second they drive away.
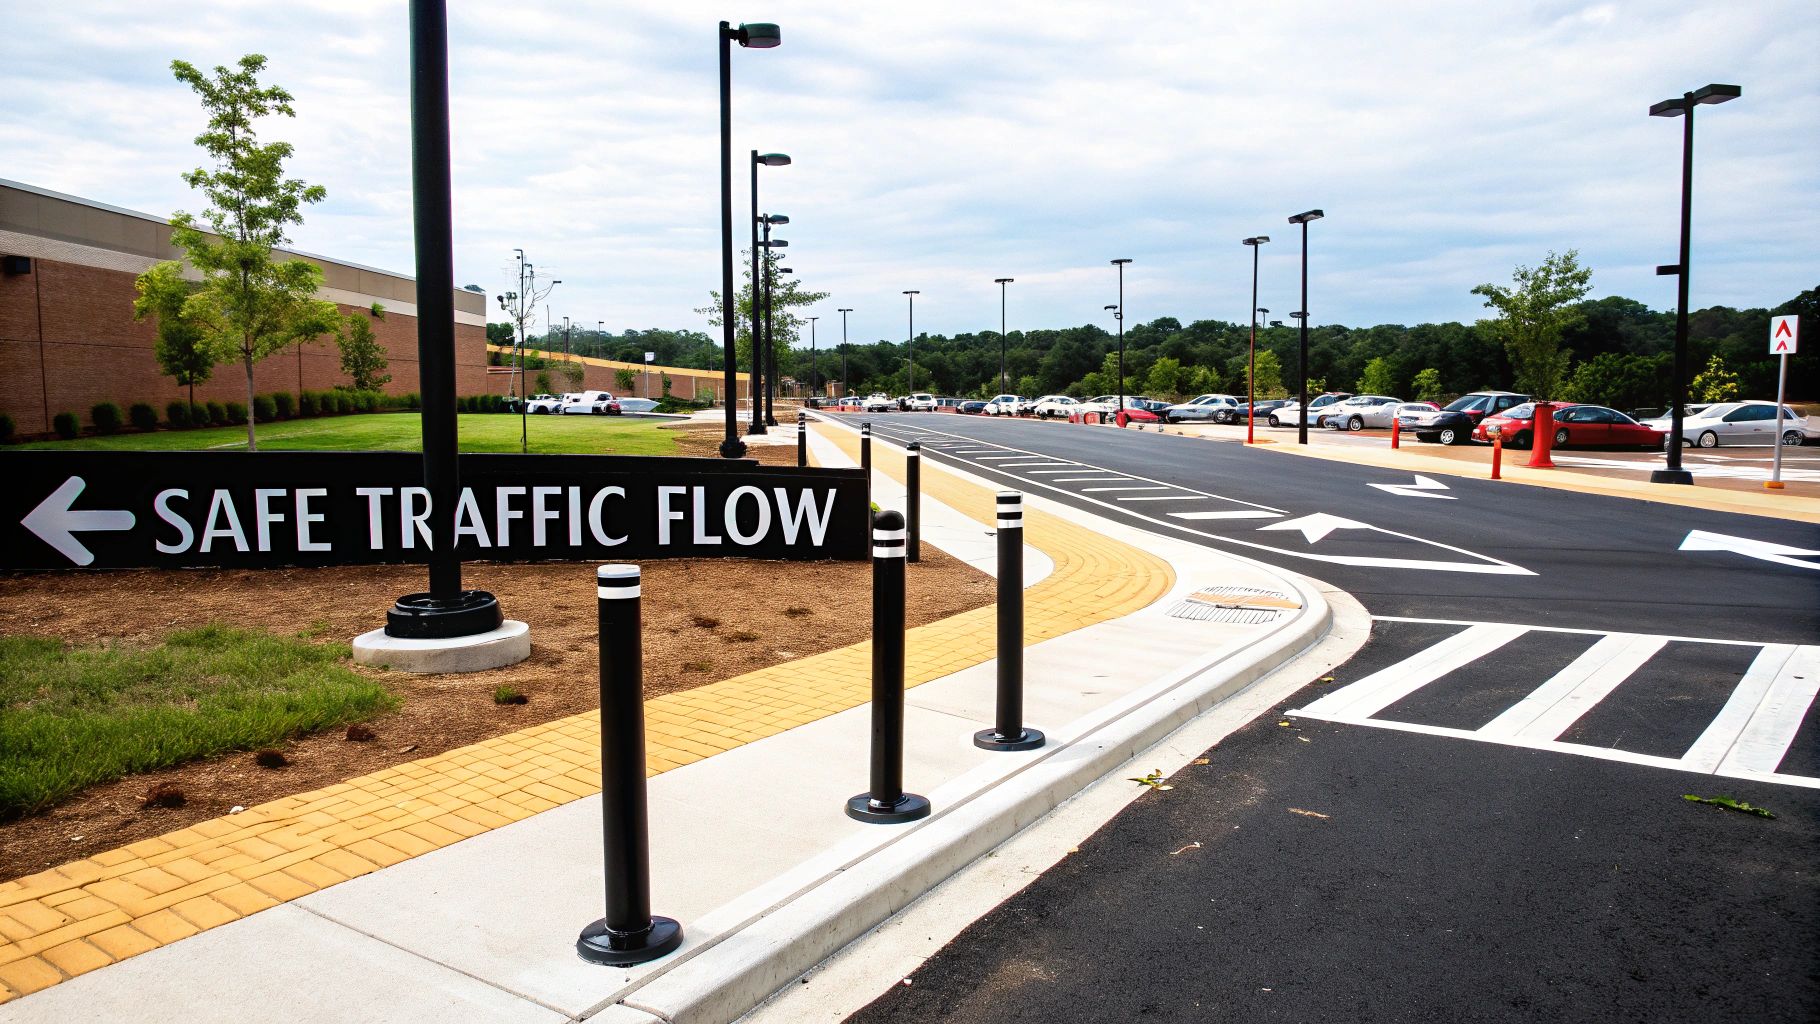
Creating a Logical Traffic Pattern
The core goal here is to make navigation completely obvious. A driver should never have to guess where to go next. You achieve this clarity with strong directional cues and by eliminating spots where traffic paths might cross unexpectedly.
For instance, angled parking is fantastic because it naturally creates one-way aisles, which dramatically reduces the chance of head-on conflicts. If you go with a 90-degree perpendicular layout, you'll need to be much more deliberate about planning for two-way traffic.
Regardless of the style, your layout needs to prioritize a few key things:
- Separate Entrances and Exits: Whenever the site allows for it, having distinct entry and exit points is a game-changer. It stops inbound and outbound traffic from jamming up in the same spot.
- Crystal-Clear Markings: Don't underestimate the power of highly visible pavement markings. Directional arrows and stop bars aren't just suggestions; they eliminate ambiguity and are fundamental to a safe lot.
- Sufficient Turning Radii: Make sure corners and the ends of aisles are wide enough for vehicles to turn without cutting across lanes or hopping curbs. A turning radius of 24 to 28 feet is a solid target for standard cars and trucks.
The Overlooked Heroes: Drainage and Lighting
Two elements that often get overlooked but have a massive impact on safety are drainage and lighting. Botch either of these, and you’re creating serious hazards.
Proper drainage isn’t just about protecting your pavement—it’s about protecting people. Your lot should have a minimum slope of 1% to 2% to keep water from pooling. Standing water is a triple threat: it eats away at asphalt, creates slip-and-fall risks for pedestrians, and turns into treacherous ice sheets in the winter. Your design absolutely must include catch basins or trench drains at low points to channel runoff away effectively.
Likewise, good lighting is a non-negotiable safety feature. A brightly lit lot is a major deterrent to crime and helps drivers and pedestrians spot each other at night. Just be smart about where you place the light poles. They need to illuminate the entire lot without becoming obstacles in driving lanes or gobbling up valuable parking spaces.
Using Landscaping and Hardscaping as Safety Tools
Landscaping and hardscape features like wheel stops and bollards aren't just for looks. They are active participants in directing traffic and protecting property and people.
Well-placed islands can break up monotonous rows of parking, create protected walkways for pedestrians, and subtly guide the flow of traffic. Wheel stops (or car stops) are crucial for preventing vehicles from pulling too far forward into sidewalks, storefronts, or other cars. For high-stakes areas, bollards provide a physical barrier, blocking vehicle access to building entrances or pedestrian-only zones.
A truly effective parking lot layout design integrates traffic flow, drainage, lighting, and protective hardscaping into one cohesive system. Each element supports the others to create an environment that is not only functional but also fundamentally safe for everyone.
Every decision should funnel back to creating a safer, more intuitive experience. Smart planning from the start is how you avoid expensive do-overs down the road. To make sure your layout holds up over the long haul, a tough inspection process is essential. Referencing a detailed construction quality control checklist can give you peace of mind that every component was installed correctly from day one. When you prioritize these operational details, you create a parking lot that works for your property, not against it.
Avoiding Costly Parking Lot Design Mistakes
Learning from others’ mistakes is a whole lot cheaper than making them yourself. This is especially true when designing a parking lot, where one seemingly small error can create a domino effect of problems, turning a well-intentioned plan into a daily source of frustration and unexpected costs.
These aren't just cosmetic issues. The wrong layout can impact safety, hamstring your site’s efficiency, and hit your bottom line hard. A poorly designed lot can frustrate customers, create dangerous traffic conflicts, and even land you in hot water with expensive non-compliance issues.
Inefficient Space and Poor Angle Choices
I’ve seen this countless times: a parking angle that’s a terrible match for the property's shape. While 90-degree parking technically crams in the most cars, forcing it into a long, narrow lot creates brutally tight turns and guarantees gridlock. It just doesn't work in the real world.
On the flip side, using a shallow 45-degree angle in a wide, spacious lot might make parking a breeze, but you’re sacrificing dozens of valuable stalls for no good reason. The trick is to match the angle to the lot’s dimensions and how people will use it. For a busy retail center with high turnover, a 60-degree angle is often the sweet spot—it strikes the perfect balance between easy access and solid capacity, keeping traffic moving even during peak hours.
Creating Bottlenecks and Ignoring Turning Radii
A layout that looks perfect on a blueprint can completely fall apart once real vehicles start using it. The classic blunder is designing aisles without enough room for a vehicle to make the turn at the end. When a driver in an F-150 or a Suburban can't make a clean turn into the next aisle, they're forced into a three-point turn, stopping all the traffic behind them.
This creates immediate bottlenecks and dramatically increases the chances of a fender-bender. As a rule of thumb, always design for a minimum turning radius of 24 feet. This ensures that even larger consumer vehicles can navigate the lot smoothly without cutting corners or encroaching on other lanes.
An effective parking lot doesn't just store vehicles; it directs them with an intuitive logic that minimizes driver stress and conflict. Every curb, island, and aisle corner should work together to create a predictable and safe path from entrance to exit.
The Problem of Over-Parking and Wasted Space
Building more parking than you actually need is a surprisingly common—and expensive—mistake. For decades, the default was simply to maximize the stall count. This often resulted in huge, underused seas of asphalt that cost a fortune to build, maintain, and light at night, tying up valuable land that could be generating income.
Studies have shown that modern parking lots in major U.S. markets are often oversized, with peak occupancy rates dipping as low as 65%. For Houston property owners, this is a huge opportunity. "Right-sizing" your lot based on real demand can unlock thousands of square feet. For instance, a 300-stall lot that never gets more than 65% full could be redesigned for 200 stalls. That simple change could free up roughly 30,000 sq ft for green space, a new pad site, or building expansion. You can discover more insights about how data-driven design can optimize commercial properties and boost your ROI.
Overlooking ADA and Fire Lane Compliance
Compliance mistakes are easily the most painful. Getting the number of accessible stalls wrong or putting them in the wrong place can lead to failed inspections, hefty fines, and the nightmare of having to black out and restripe a brand-new lot. It's not just about having enough ADA stalls; they absolutely must be on the shortest accessible path to the building entrance.
Fire lanes are just as critical and completely non-negotiable. We've seen projects where landscape islands or concrete wheel stops accidentally crept into the required 24-foot clearance, forcing a costly, last-minute demolition and redesign. The only way to avoid these headaches is to bake ADA and fire lane requirements into your very first draft. It saves time, money, and a whole lot of stress down the road.
Answering Common Parking Lot Design Questions
When you're planning a new parking lot layout, a lot of questions pop up. After years of working with property managers and general contractors all over the Houston area, I've noticed the same practical concerns come up time and time again. Let's get you some clear, straightforward answers to the questions I hear most often.
What Is the Most Efficient Parking Angle for a Commercial Lot?
This is a great question, but the "best" angle really depends on what you're trying to achieve with your property.
If your number one goal is to cram as many vehicles as possible into a space, then 90-degree parking is your winner, hands down. It's the king of space efficiency. The trade-off? You'll need wider aisles—typically 24 feet—to handle two-way traffic safely, and some drivers find it a bit trickier to back out of these spots.
But what if you're more focused on customer experience and smooth traffic flow, like at a busy retail center? In that case, 60-degree angled parking is a fantastic choice. It lets you use narrower, one-way aisles (around 18 feet), and it’s significantly easier for drivers to pull in and out. This simple change can speed up parking, cut down on frustrating congestion, and leave customers with a much better impression.
How Often Should a Parking Lot Be Restriped?
The lifespan of your parking lot stripes really boils down to two things: the type of paint you use and how much traffic you get every day.
Most lots use a standard water-based traffic paint. It gets the job done, but in a high-traffic commercial setting, you can expect it to look good for about one to two years. After that, the fading starts to become a real issue for both safety and curb appeal.
For property owners who want a more "set it and forget it" solution, we often recommend thermoplastic markings. This stuff is heat-applied, so it literally bonds with the pavement. It's not uncommon for thermoplastic to last five to seven years, sometimes even longer.
My advice is to walk your lot at least once a year and really look at it. The second you see faded stop bars, unclear directional arrows, or worn-out ADA markings, it’s time to schedule a restripe. Crisp, clear lines are non-negotiable for safety, compliance, and maintaining a professional image.
Can I Change My Parking Lot Layout Without Repaving?
Absolutely. In fact, redesigning a layout on an existing surface is one of the most cost-effective ways to give your property a major functional upgrade. You don't need to tear up the asphalt to make a huge difference.
The process starts with line removal. Using specialized grinders or black-out paint, we can effectively erase the old layout. Once we have a blank canvas, we can lay down an entirely new striping plan based on your updated design.
This is the perfect fix for a few common situations:
- Reclaiming wasted space in an oversized or poorly designed lot to add landscaping.
- Correcting non-compliant ADA stalls that don't meet current access aisle or slope requirements.
- Switching from inefficient angled stalls to a higher-capacity 90-degree layout for an employee-only area.
A professional layout change can completely transform your lot's safety and capacity without the massive expense and downtime of a full repaving project.
An effective parking lot layout is the foundation of a safe, compliant, and welcoming property. If you’re ready to optimize your space, ensure compliance, or simply give your lot a fresh, professional look, the team at Houston Parking Lot Striping is here to help. With over 15 years of experience, we deliver precise, durable results that meet all local codes. Contact us today for a free estimate on your project.