

A Guide to Handicap Parking Signage Requirements in Houston
Getting your property's accessible parking signage right is about more than just dodging fines—it's about creating a genuinely welcoming and safe environment for every visitor. The regulations, driven primarily by the Americans with Disabilities Act (ADA), are incredibly specific about sign dimensions, mounting heights, and symbols. Overlooking these details isn't an option; it can lead to hefty penalties and legal headaches.
Why Core ADA Signage Rules Are Non-Negotiable
Think of ADA-compliant signage as the universal language of accessibility. For property owners and contractors here in Houston, mastering these foundational rules is the first and most critical step toward compliance. These aren't just arbitrary rules; each one serves a very practical purpose, ensuring that designated spaces are easy to spot and use for people who rely on them.
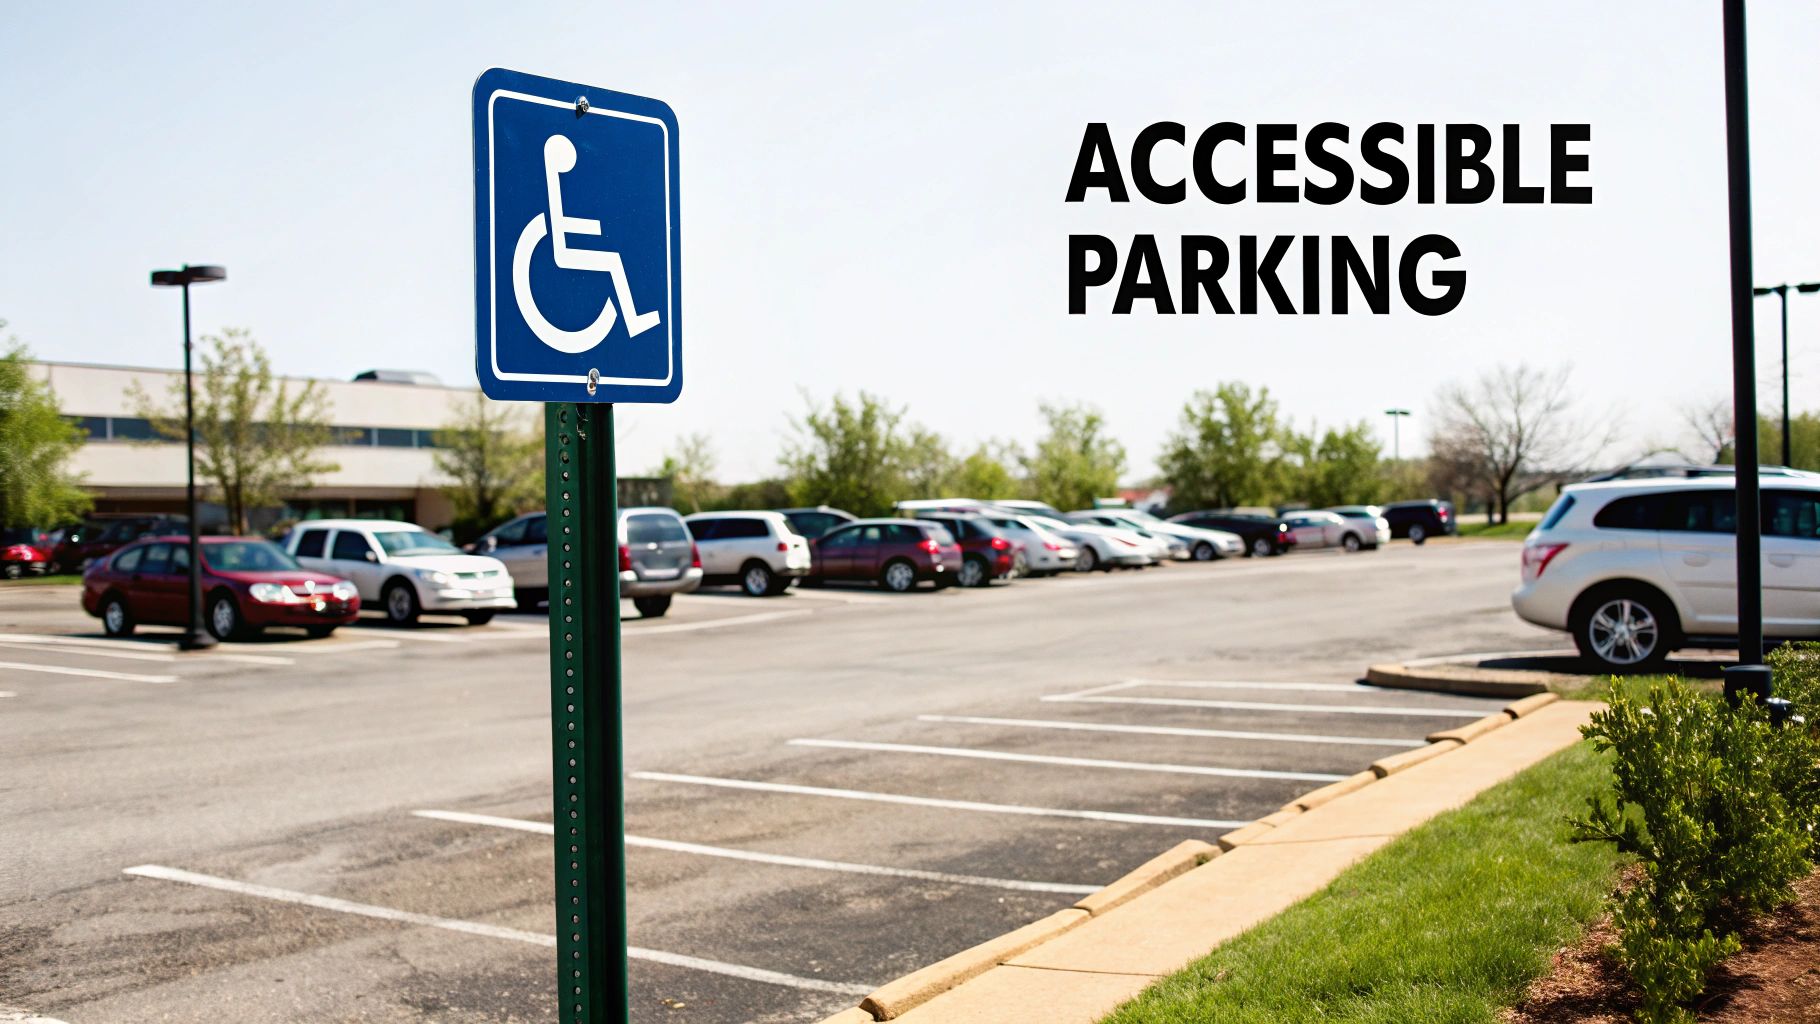
The ADA standards, which were updated with rules effective March 15, 2012, set the national baseline. At its heart, the law requires every accessible parking space to be marked with a sign featuring the International Symbol of Accessibility (the familiar white wheelchair figure on a blue background). But it doesn't stop there. The sign must be on a post, and its bottom edge has to be at least 60 inches (5 feet) off the ground. This keeps it visible even when a tall truck or van pulls in.
To help you get a quick handle on these foundational rules, here’s a simple breakdown of the federal requirements that apply everywhere, including Houston.
Federal ADA Signage Requirements at a Glance
| Requirement Element | Federal ADA Specification | Reasoning Behind the Rule |
|---|---|---|
| The Symbol | Must display the International Symbol of Accessibility (ISA). | The ISA is a universally recognized symbol that instantly communicates the space's purpose. |
| Sign Dimensions | Must be at least 12 inches wide by 18 inches tall. | This size is large enough to be easily seen from a distance, preventing accidental use by unauthorized drivers. |
| Mounting Height | Bottom edge must be a minimum of 60 inches above the ground. | This height ensures the sign is visible over the hood of a parked vehicle, including larger vans and SUVs. |
These three elements form the non-negotiable foundation of accessible parking signage. You have to get these right before you even begin to consider any additional state or local rules.
Why Every Detail Matters
Put yourself in the shoes of a driver with a mobility impairment trying to navigate a packed Houston parking lot. A sign that’s too small, mounted too low, or hidden behind a bush is effectively useless. It leads to frustration, confusion, and wasted time. The ADA’s strict guidelines are designed to eliminate that guesswork.
A sign mounted too low is a sign that doesn't exist. The 60-inch rule ensures that the symbol acts like a beacon, clearly visible above the hood of a large truck or the roofline of a sedan, guiding those who need it most.
The 60-inch height ensures clear sightlines in a busy lot, the 12×18 inch size makes the sign prominent, and the ISA offers instant recognition. For a property manager, getting one of these details wrong can invalidate the entire effort. A perfectly striped space with a sign mounted at 55 inches is still a violation.
Nailing these three core requirements is the absolute first step toward building a safe, accessible, and legally compliant property for everyone. Get the basics right, and everything else falls into place. For more details on the ADA's accessibility standards, you can explore the official guidance from the U.S. Access Board.
Getting Van-Accessible Spaces Right
While all accessible parking spaces are important, van-accessible spots are a different beast altogether. They have their own specific, and much stricter, set of rules. I've seen more confusion and costly compliance mistakes related to these spaces than almost any other aspect of parking lot striping. Getting these handicap parking signage requirements right is about so much more than just slapping the words "van-accessible" on a sign—it's about ensuring the space actually works for the vehicles it's designed for.
Many vans and trucks used by people with disabilities are fitted with side-mounted ramps or lifts. A standard accessible space just isn't wide enough for this equipment to deploy, making the spot completely useless for them. That’s precisely why van-accessible spaces exist: to provide genuine, functional access for all types of adaptive vehicles.
The Access Aisle: Why Size Matters
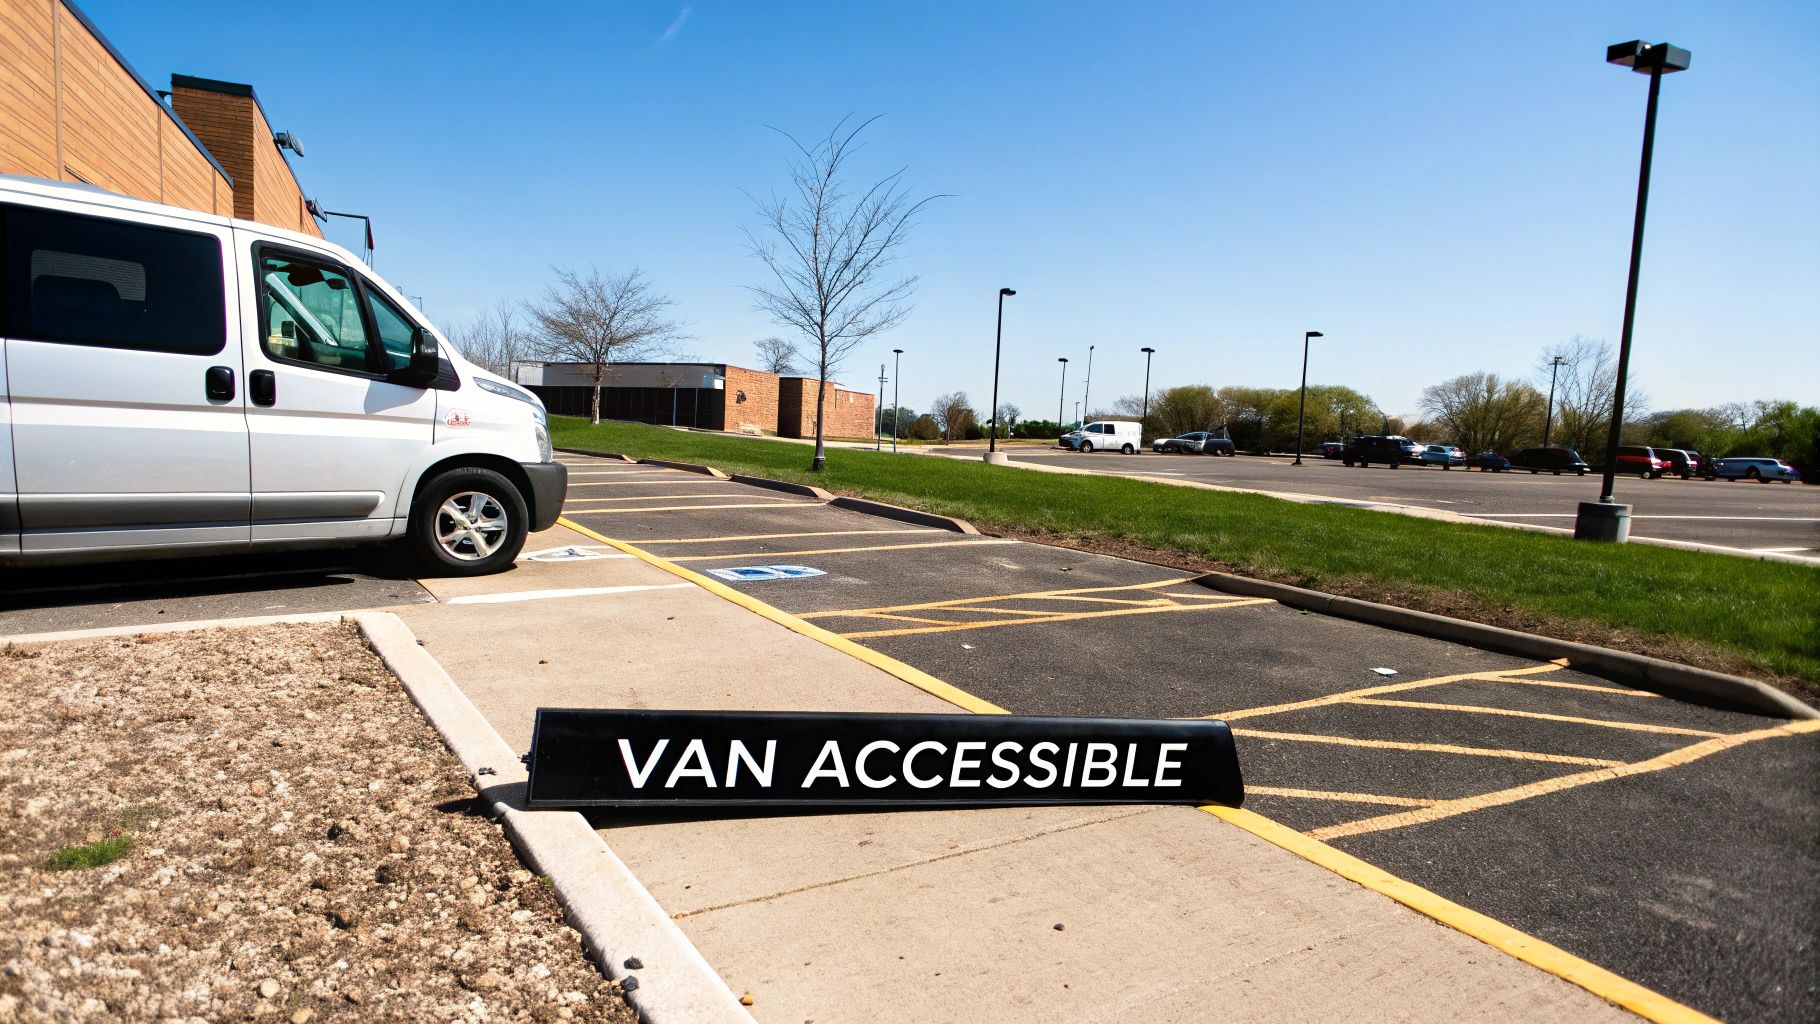
The single biggest difference between a standard and a van-accessible space is the access aisle—that's the striped, no-parking zone right next to the stall. While a standard spot requires a 60-inch (5-foot) aisle, the requirement for van-accessible spaces is significantly larger.
Under the ADA, van-accessible parking spaces must have an access aisle at least 96 inches (8 feet) wide. This isn't just a suggestion; it's the absolute minimum clearance needed for a wheelchair lift to fully extend and for someone to safely get on and off it.
Think of that 8-foot aisle as a built-in operational zone. Without it, someone using a side-entry van could be effectively trapped inside their vehicle, unable to lower their ramp because another car parked too close. The wider aisle is a simple design feature that prevents this from happening, guaranteeing reliable access.
The 1-in-6 Rule: How Many Do You Need?
So, how many of these super-sized spaces do you need in your lot? The ADA lays out a pretty clear formula. It's a key piece of the puzzle for your lot's overall compliance plan.
The rule is simple and non-negotiable:
- For every six accessible parking spaces you have (or fraction thereof), at least one must be van-accessible.
- If your parking lot is small and only requires one accessible space, that single space must be a van-accessible one.
This 1-in-6 ratio is the benchmark to use when planning a new layout or restriping an existing lot. For example, if a Houston retail center needs 12 accessible spots, at least two of them have to be built to van-accessible standards.
A Quick Houston Scenario
Let's put this into a real-world context. Picture a family pulling into a Houston medical clinic. Their van has a side-mounted ramp for their child’s wheelchair. They find the designated van-accessible spot with its mandatory 8-foot access aisle. This gives them plenty of room to deploy the ramp, get the wheelchair out, and safely help their child from the vehicle onto the sidewalk. The system worked as intended.
Now, imagine that spot only had a standard 5-foot aisle. The car parked in the next stall would completely block the ramp. The family would be stuck, forced to either hunt for another spot (which might not exist) or try a risky transfer in a live traffic lane. This is exactly why the specific dimensions and handicap parking signage requirements for van stalls are so critical. It’s not about checking a box on a form—it’s about ensuring real, functional accessibility for everyone.
Getting It Right in Texas and Houston
Meeting federal ADA standards is your foundation, but if you're managing property in Texas, that's just the starting point. Think of the ADA as the national baseline. Texas and the City of Houston then add their own specific rules on top of that. A lot of people get tripped up here, and it's an expensive mistake to make because state and city inspectors play by their own, often stricter, set of rules.
To get your handicap parking signage requirements right in Houston, you have to understand how all three levels—federal, state, and local—fit together. This brings us to the Texas Accessibility Standards (TAS). While the TAS often lines up with the ADA, it has its own unique requirements that can be more demanding. The rule of thumb is simple: when federal and state laws conflict, you must follow the one that provides more accessibility.
The Texas-Mandated Penalty Sign
Here’s one of the biggest differences you'll find between federal ADA rules and Texas law: the mandatory penalty sign. The ADA requires the standard blue International Symbol of Accessibility (ISA) sign, but Texas adds another layer to really crack down on illegal parking.
This second sign has to be posted right below the main ISA sign. It's a direct, no-nonsense warning to anyone thinking about parking there illegally.
In Texas, every single accessible parking space must have a sign spelling out the penalties for improper use. You'll often see phrases like "Violators Subject to Fine and Towing" or something similar that makes the consequences crystal clear.
This isn’t just a suggestion; it’s a non-negotiable part of a compliant parking space in Texas. You could have a perfectly measured and mounted ISA sign, but if that penalty notice is missing, you're in violation of state law. That sign is what gives enforcement the teeth to ticket and tow, keeping these crucial spots open for the people who depend on them.
Houston's Local Enforcement and Ordinances
While Texas sets the state-wide standards, it’s the City of Houston that handles the on-the-ground enforcement. When you're pulling permits for new construction or a major renovation, Houston's inspectors will be meticulously checking your property against both ADA and TAS standards. For property managers and contractors here, that means there’s zero wiggle room. A project can get hit with serious delays and extra costs if just one accessible spot fails inspection.
This intense local focus makes knowing the details absolutely essential. A Houston inspector is going to be looking for:
- The correct ISA sign mounted at the proper height.
- The mandatory Texas penalty sign posted below it.
- Proper van-accessible signs and clear, wide access aisles.
- Accurate stall dimensions and fresh, visible pavement markings.
Looking at the bigger picture, the heart of these rules is consistent worldwide. The ISA, first standardized back in the 1960s, is now recognized in over 40 countries. This global standard means a traveler with a disability can spot accessible parking almost anywhere. Here in the US, the ADA's rules—like the 60-inch minimum mounting height for the ISA sign and the required number of spaces (for example, 4% of spots must be accessible in lots with 201-300 spaces)—are what support this international system. You can read more about how these symbols work globally on BlueBadgeInsurance.com.au.
For anyone managing property in Houston, mastering these layers isn't optional. It’s how you ensure your facility meets the national standard while also satisfying the specific, enforceable laws of Texas. Getting both right is the only way to protect your investment and provide a genuinely accessible space for everyone. For a deeper dive into these standards, you might be interested in our guide on ADA handicap parking space requirements.
Ensuring Proper Sign and Stall Placement
Having a perfectly designed sign is only half the battle. A compliant sign placed in the wrong spot is just as much of a violation as using the wrong sign altogether. Getting the placement of both the sign and the parking stall right is a critical piece of the puzzle, ensuring your property is not just technically compliant but genuinely accessible.
It all starts with what’s known as the "head of the stall" rule. The ADA is very clear: the sign identifying an accessible space must be located at the front of the parking stall. This specific positioning gets rid of any guesswork for drivers, making it obvious which space the sign applies to and preventing confusion in a busy lot.
But where you put the sign is just one detail. The location of the entire stall is arguably even more important.
The Shortest Accessible Route Mandate
The ADA requires accessible parking spaces to be located on the shortest accessible route of travel to an accessible facility entrance. Think of it as creating a direct, barrier-free path from the car door to the building’s front door. This isn't just about being the closest "as the crow flies"; it's about providing the most direct, convenient, and safest path for a person with a mobility impairment.
The concept of an "accessible route" is key here. The path must be completely free of obstacles.
- No Curbs: The route can't force someone to go up or down a curb without a proper curb ramp.
- No Stairs: Any change in elevation has to be managed with a ramp or an elevator.
- No Landscaping: The path can't cut through grass, mulch beds, or other unpaved ground.
- No Traffic: The route shouldn't make individuals travel behind parked cars or through active vehicle lanes.
This hierarchy of parking rules, from the federal level down to local city codes, governs these placement decisions.
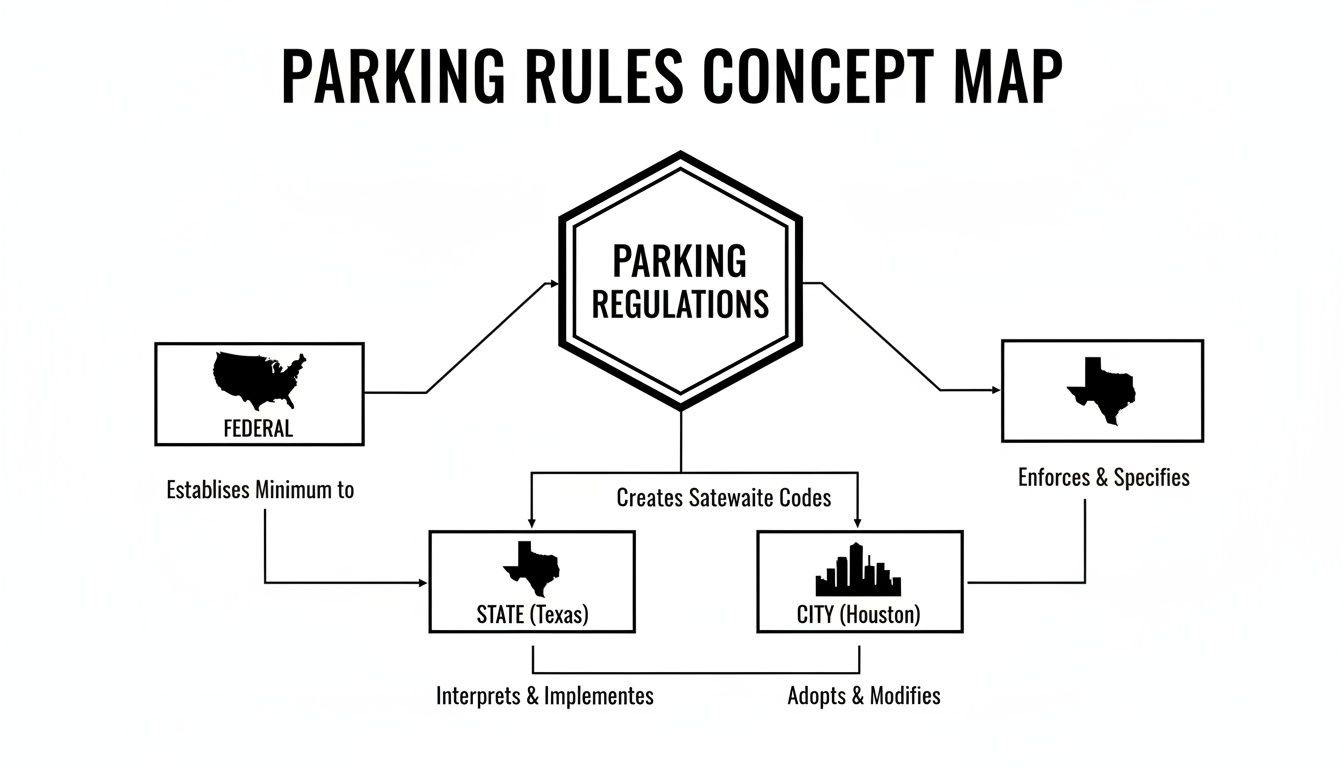
As you can see, compliance is a layered responsibility. Federal ADA laws provide the foundation, Texas state laws add their own requirements, and Houston city ordinances drive local enforcement.
A Real-World Retail Center Example
Picture a bustling Houston retail center with a big parking lot. The property manager has designated accessible spots right next to the main entrance. At first glance, this seems correct—they are the closest spaces.
The problem? Between those stalls and the sidewalk, there's a six-inch curb and a narrow strip of landscaping. To get to the entrance, a person using a wheelchair would have to travel down the parking lot, wheeling behind other cars, just to find a curb ramp 50 feet away. This layout completely violates the shortest accessible route requirement.
A truly compliant layout is a complete system. The accessible stall, its access aisle, the curb ramp, and the sidewalk must all connect seamlessly to create an uninterrupted path to the building entrance.
Fixing this involves more than just moving a sign. A compliant solution would mean either relocating the accessible stalls to a spot that directly connects to an existing curb ramp or installing a new ramp right in front of the prime parking spaces. This ensures the journey from the vehicle to the front door is as short and safe as it can be. For anyone planning new layouts, understanding how to stripe parking lots with accessibility in mind from day one is the best way to avoid these expensive retrofits.
Ultimately, proper placement transforms a parking lot from a simple grid of spaces into an accessible system designed for safety and ease of use. It’s all about foreseeing the user's path and engineering it to be effortless—a core principle behind all handicap parking signage requirements.
Spotting (and Fixing) the Most Common Compliance Mistakes
Even with the best of intentions, getting accessible parking right can be tricky. The mistakes are almost always small oversights, but they can quickly snowball into hefty fines, legal trouble, and the kind of rework that blows a project budget.
The good news? Most of these errors are surprisingly common and easy to prevent once you know what to look for. Think of this as your field guide to spotting the pitfalls before an inspector does. We'll walk through the most frequent slip-ups we see and show you exactly how to fix them.
Mistake 1: Signs Mounted Too Low
This one is probably the most common mistake we encounter. The federal ADA standard is crystal clear: the bottom of your accessible parking sign must be at least 60 inches (5 feet) off the ground.
There’s a practical reason for this. That height ensures the sign is visible over the hood of any parked vehicle, from a compact car to a full-size van.
- What Goes Wrong: Someone mounts the sign on a low wall or a short, pre-existing post for convenience. It looks fine until a truck pulls in, and the sign completely disappears from view.
- The Simple Fix: Always measure from the ground surface up to the bottom edge of the sign. If a wall or bollard is too low, you need to install a dedicated signpost at the head of the parking space. It’s the only way to guarantee you hit that 60-inch minimum.
Mistake 2: The Missing "Van-Accessible" Sign
Van-accessible spaces are a different beast. They aren't just wider stalls; they need specific signage to match. Simply providing the extra space without the right sign means the spot isn't actually compliant.
- What Goes Wrong: A properly-sized van space is marked with a generic accessible parking sign, completely omitting the "VAN ACCESSIBLE" text.
- The Simple Fix: Every single sign designating a van-accessible space must include the words "VAN ACCESSIBLE." This can be on the main sign itself or on a smaller plaque mounted directly below the International Symbol of Accessibility.
Forgetting the "VAN ACCESSIBLE" text is like labeling a fire exit as just "Exit." It’s technically true, but it leaves out critical information. That small detail is a major compliance checkpoint for inspectors.
Mistake 3: Faded, Damaged, or Hidden Signs and Markings
Compliance isn't a "set it and forget it" task. The Texas sun is brutal on signs, and daily traffic grinds pavement markings into oblivion. Throw in some fast-growing landscaping, and your perfectly compliant signs can become useless.
If a driver or an inspector can't read your sign or see the stall markings, your space is non-compliant. It's that simple.
- What Goes Wrong: The blue and white paint on the pavement is so faded you can barely see the lines. The sign itself is peeling, or it’s completely hidden behind a thick tree branch that hasn’t been trimmed in years.
- The Simple Fix: Make parking lot inspections part of your regular maintenance schedule. At least twice a year, walk the property. Budget to restripe the pavement every couple of years to keep the markings crisp, and immediately replace any signs that are faded or damaged. And get the trimmers out—all signs need a clear line of sight from the driver's seat.
Mistake 4: Unmarked or Poorly Marked Access Aisle
The access aisle—that striped zone next to a stall—is just as important as the parking space itself. Its entire purpose is to provide a safe area for someone to deploy a ramp or lift. If another car parks there, the accessible stall is effectively blocked.
- What Goes Wrong: The access aisle is left completely blank, or the striping is so ambiguous that people think it's a motorcycle spot. We've seen it all.
- The Simple Fix: The access aisle must be marked with diagonal stripes (hatching) to make it obvious that it is a no-parking zone. While the ADA doesn't mandate it, stenciling "NO PARKING" right in the middle of the aisle is a Texas requirement and a smart best practice everywhere. It leaves no room for confusion.
Catching these issues early saves you time, money, and a whole lot of headaches. A quick walk around your property with this checklist in hand can help you find and fix these problems before they become expensive violations.
Your Essential ADA Compliance Checklist
Knowing the rules is one thing, but putting that knowledge to work is what truly makes a property safe and accessible. This checklist is designed to help you do just that. Think of it as a quick, practical audit you can perform yourself.
Walk your property with this guide in hand. By breaking down the handicap parking signage requirements into simple, yes-or-no questions, you can quickly spot potential red flags and get a real sense of where your parking lot stands on compliance.
Signage and Mounting
The signs are the first thing people—and inspectors—notice. Getting them right is critical.
- ISA Symbol Present: Is the classic blue and white International Symbol of Accessibility clearly displayed on every sign?
- Correct Mounting Height: Grab a tape measure. Is the bottom edge of every sign at least 60 inches off the ground? This is measured from the parking surface up.
- "Van Accessible" Wording: For the larger van spots, does the sign explicitly say "VAN ACCESSIBLE"? This exact wording is mandatory.
- Texas Penalty Sign: In Texas, you also need a secondary sign that spells out the consequences. Does it state the penalties for parking illegally, like "Violators Subject to Fine and Towing"?
Pavement Markings and Dimensions
What's painted on the ground is just as important as the signs on the posts. If the lines are faded or drawn incorrectly, the space isn't compliant.
- Crisp, Clear Lines: Are the stall lines, access aisle hash marks, and painted symbols bright and easy to see? Faded paint is a common violation.
- Standard Aisle Width: Does the access aisle next to a standard accessible spot measure at least 60 inches (5 feet) across?
- Van Aisle Width: Is the access aisle for a van-accessible space a full 96 inches (8 feet) wide?
- Hatched Aisle: Is the access aisle clearly marked with diagonal stripes (hatching) to show that it’s a strict no-parking zone?
Placement and Path of Travel
A perfectly marked stall is useless if it's in the wrong spot. Placement is all about ensuring a person can actually get from their car to the building entrance without any issues.
- Head of Stall Location: Is each sign posted right at the front of its designated parking space?
- Shortest Accessible Route: Are your accessible spaces truly the closest ones to a primary, accessible entrance? They need to be on the most direct, barrier-free path.
- Obstruction-Free Path: Look at the route from the access aisle to the door. Is it completely clear of obstacles? Watch out for curbs without ramps, stairs, or even poorly placed landscaping.
This checklist is more than just a list of rules. It’s a tool to shift your perspective from just knowing the requirements to actively ensuring your property works for everyone who visits.
What to Do Next
So, what did you find? If your walk-through uncovered any issues—a low-hanging sign, a faded access aisle, or an obstructed path—your best move is to call a professional pavement marking contractor. They can provide an expert assessment to confirm your findings, spot things you might have missed, and lay out a clear plan to get your property 100% compliant.
If you're planning a new project, bring in a striping expert from day one. Designing for compliance from the very beginning is far cheaper and easier than fixing mistakes after the concrete is poured. To get a better handle on managing these details, see how a construction quality control checklist can keep your entire project running smoothly.
Your Top Questions About Parking Signage Answered
When you're dealing with the specifics of handicap parking, a lot of questions can pop up. Let's tackle some of the most common ones we hear from property owners and contractors right here in the Houston area.
Does Every Single Accessible Spot Need Its Own Sign?
Yes, it absolutely does. According to the Americans with Disabilities Act (ADA), you can't get away with one sign for a whole row. Every single accessible parking space needs its own dedicated, permanently mounted sign right at the head of the stall.
It's a common mistake to see one sign intended to cover multiple spots, but that’s a clear violation. The rule is there for a reason: it leaves no room for confusion for drivers who need that space or for officials who enforce the law.
What if My Signs Are Faded or Damaged?
If a sign is peeling, faded, or so damaged you can't read it clearly, it's not compliant. The ADA is very specific that all signs and the painted markings on the pavement have to be properly maintained so they're always visible.
Think of it this way: a worn-out sign might as well not be there at all. If your signs are looking rough, they need to be replaced right away. This isn't just about avoiding fines; it's a crucial part of routine property maintenance and limiting your liability.
A faded sign is like an expired permit—it no longer serves its legal purpose. Your regular property walk-throughs should always include a check on the condition of your accessible parking signs.
Can I Just Install ADA Signs Myself?
You can certainly buy compliant signs from a supplier, but trying to install them yourself is a gamble that rarely pays off. Getting the handicap parking signage requirements right is about so much more than just putting a sign on a post.
True compliance comes down to the details, and they have to be perfect. For instance:
- Precise Mounting Height: Is the bottom of the sign at least 60 inches off the ground? Not 59, not 61. 60 inches is the minimum.
- Correct Placement: Is the sign located directly at the head of the parking space, not off to the side?
- Verified Dimensions: Are the stall and the access aisle next to it striped to the exact, required measurements?
Bringing in a professional is the surest way to know that every detail is handled correctly. It protects your property from costly violations and, more importantly, ensures your parking lot is genuinely accessible for everyone.
Making sure your property is fully compliant doesn't have to be a headache. At Houston Parking Lot Striping, we have the hands-on experience to manage every part of your ADA-compliant signage and striping needs, from a brand-new layout to simple maintenance. Visit us at https://houstonparkinglotstriping.com to get a free estimate and make sure your lot is safe, accessible, and completely up to code.