

How to Seal Coat Asphalt for Lasting Pavement Protection
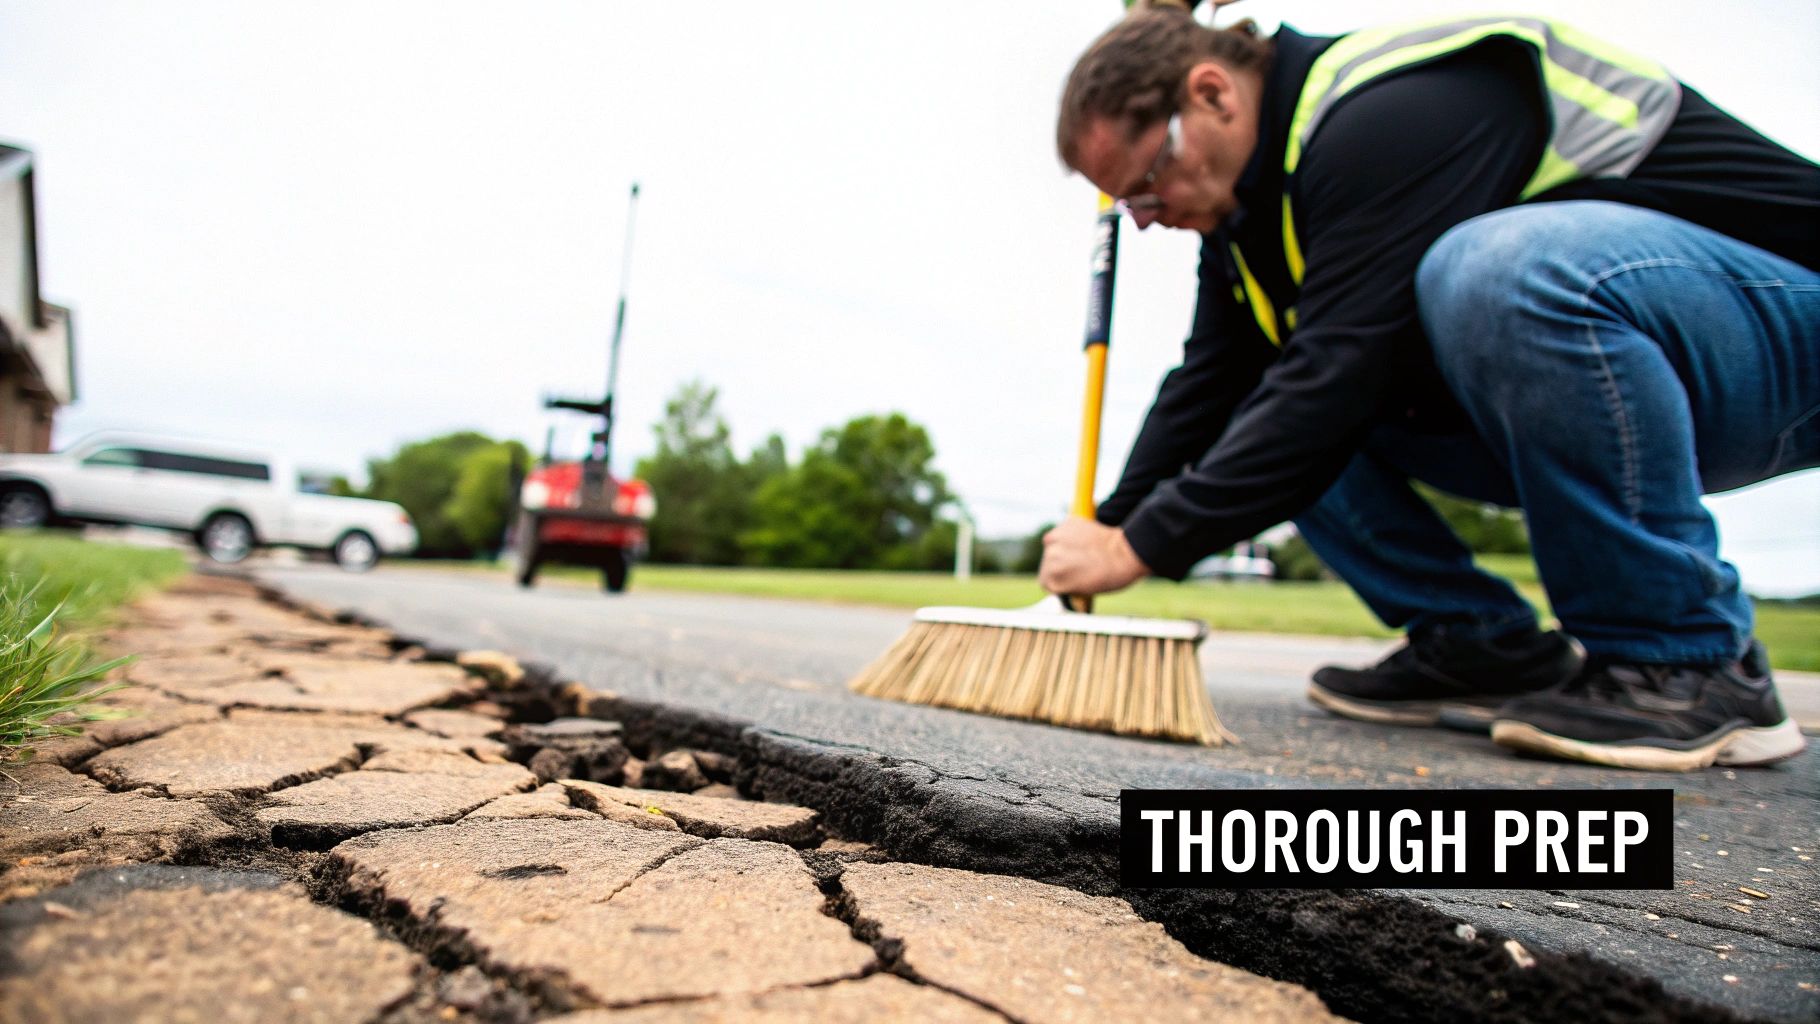
If you take only one thing away from this guide, let it be this: thorough preparation is everything. The longevity and look of your seal coat job aren't decided when you're laying down the final coat. They’re determined long before that, in the meticulous cleaning, patching, and crack-filling you do first. This foundational work is what allows the sealer to properly bond and give you the protection you're paying for.
Laying the Groundwork for a Perfect Seal Coat
Think of your asphalt parking lot like a canvas. You wouldn’t start painting over dirt, holes, and peeling paint and expect a masterpiece, right? The same logic applies here. Slapping a seal coat over a poorly prepared surface is just a waste of time, money, and material. It's the fast track to premature failure and an unprofessional-looking property.
The most common—and costliest—mistake I see property managers make is rushing this initial stage. A systematic approach to assessing and repairing the surface is the only way to guarantee a successful project.
Conduct a Thorough Surface Assessment
Before a single tool comes out, you need to walk the entire lot with a critical eye. This isn't a casual stroll; it's a professional inspection to find every single flaw that could sabotage the seal coat. I always recommend taking photos and detailed notes.
Be on the lookout for these classic asphalt problems:
- Alligator Cracking: Those interconnected cracks that look like an alligator's back are a bad sign, usually pointing to base failure. While a seal coat won't fix the root cause, filling the cracks will stop water from getting in and making things worse.
- Linear Cracks: These are the single cracks you see running across the pavement. If it's wider than a credit card, it absolutely must be filled.
- Potholes: Think of these as cancer for your pavement. They need to be professionally patched before you even consider sealing. Remember, sealer is a thin coating, not a filler for deep voids.
- Oil and Gas Stains: Seal coat and petroleum don't mix. The sealer will not stick to these stains and will peel off almost immediately if they aren't treated first.
- Faded Color: Has your lot turned from rich black to a washed-out gray? That's heavy oxidation. It means the asphalt's binders have broken down, making the surface brittle and porous—a perfect candidate for a protective seal coat.
For instance, you'll almost always find that the entrance and exit lanes of a busy retail center show more severe wear, like alligatoring, than the parking stalls way in the back. Identifying these high-traffic zones helps you budget and prioritize the most critical repairs.
The Critical Cleaning Process
Let me be blunt: a quick sweep with a push broom won't cut it for a commercial property. Fine dirt, dust, and sediment get ground deep into the asphalt's pores over time. If you don't get that debris out, the sealer can't bond properly with the pavement.
Your cleaning has to be aggressive and done in stages. Start with a power blower or a mechanical rotary brush to clear all the loose stuff—leaves, gravel, and surface dirt. Then, come back with a high-pressure wash to blast away the stubborn grime and deep-seated contaminants. This is a non-negotiable step; it opens up the asphalt's pores so the sealer can really sink in and grab hold.
Key Takeaway: The only acceptable foundation for a seal coat is a professionally cleaned one. If the surface isn't immaculate, the sealer just sits on top of a layer of dirt instead of bonding to the asphalt. You'll see it peeling and flaking within a few months.
Repairing Cracks and Damage
Once the surface is spotless, it’s time to tackle the issues you found during your walk-through. This is where you build the smooth, stable foundation your new seal coat needs. First, hit any oil spots with a specialized primer designed to create a barrier that allows the sealer to adhere.
Next, it's all about the cracks. For any fissure wider than a hairline, you’ll need to use a hot-pour or cold-pour rubberized crack filler. This material stays flexible, preventing water from seeping into the sub-base—which is what causes potholes and major pavement failure in the first place. When all the cracks are filled correctly, you get a uniform surface that makes the final seal coat look smooth and professional. It’s also worth considering how a well-thought-out parking lot layout design can help manage traffic and reduce concentrated wear and tear.
It's a staggering fact, but over 90% of parking areas in the United States are paved with asphalt. That makes seal coating an essential piece of maintenance for extending their lifespan and keeping properties looking sharp. This massive reliance on asphalt means commercial lots take a constant beating from traffic, oil spills, and weather. A good seal coat acts as a protective shield, closing off tiny cracks and stopping water infiltration before it leads to bigger, more expensive problems. You can dig into more data from the National Asphalt Pavement Association on the seal coat market.
Choosing the Right Materials and Equipment
Getting your materials and equipment lined up is more than just a pre-flight check; it's the foundation of a successful seal coat job. The products you choose are your pavement's new armor, and your tools determine how well that armor is fitted. Skimp here, and you'll pay for it later in durability and appearance.
The biggest decision you'll make right out of the gate is the sealer itself. For a long time, coal tar was the go-to, but the industry has moved on to something much better—and safer.
Selecting Your Sealer: Asphalt Emulsion vs. Coal Tar
These days, asphalt emulsion sealers are the undisputed professional standard, and for good reason. They are asphalt-based products designed to protect an asphalt surface, which means they are chemically simpatico. This natural compatibility creates a powerful bond, resulting in a flexible coating that moves with the pavement as temperatures fluctuate. That means far less risk of cracking down the road.
On the other hand, coal tar sealers are a byproduct of coking coal. They are known for being highly resistant to fuel spills, but that’s where the benefits end. Coal tar is rigid, brittle, and contains high levels of Polycyclic Aromatic Hydrocarbons (PAHs), which are a significant environmental and health concern. In fact, many cities and states have outright banned them.
For any modern commercial property, asphalt emulsion is the only real choice. The industry's pivot to asphalt-based sealers was a game-changer, and they now command an impressive 68% of the global seal coat market share. They were specifically developed to outperform coal tar without the environmental baggage, offering top-tier protection from UV rays, chemicals, and water intrusion at a similar application cost. You can get more details on the growth of the sealing coatings market on businessresearchinsights.com.
The Role of Strategic Additives
You’ll rarely use a professional-grade sealer straight out of the pail. Additives are the secret sauce, mixed in to fine-tune the performance for your specific property’s needs.
Here’s what you'll typically be working with:
- Sand or Slag: This is non-negotiable for safety. It creates a non-slip texture that’s critical for pedestrian walkways, ramps, and any sloped areas. As a bonus, it adds a layer of toughness and helps fill in minor surface blemishes.
- Polymers: Think of these as a steroid shot for your sealer. Polymers boost flexibility, toughen the finish, and improve resistance to fuel and oil. For a high-traffic retail parking lot, a polymer additive can drastically extend the life of the job.
- Drying Accelerants: When you're up against the clock, or dealing with cooler, humid weather, these additives are a lifesaver. They speed up the curing process, letting you get traffic back on the lot hours sooner.
Imagine a busy Houston shopping center. It sees constant vehicle traffic and has people walking across the lot all day. The ideal mix here would be a top-shelf asphalt emulsion sealer fortified with polymers for durability and sand for crucial slip resistance.
Pro Tip: Don't eyeball your mix ratios. The manufacturer's specs are there for a reason. Adding too much or too little of an additive can throw off the chemical balance and ruin the entire application.
Squeegee vs. Spray Application: What to Choose
The "how" is just as important as the "what." Your application method—squeegee or spray—directly impacts the final result, and the best choice often depends on the condition of the pavement.
This table breaks down the two primary methods to help you decide what's right for your project.
| Feature | Squeegee Application | Spray Application |
|---|---|---|
| Best For | Initial coats, porous/rough surfaces | Second coats, smooth surfaces |
| Coverage | Thicker, forces material deep into pores | Thinner, more uniform finish |
| Speed | Slower, more labor-intensive | Faster, perfect for large, open areas |
| Appearance | Can sometimes show faint application lines | Smooth, even, professional look |
For that all-important first coat, especially on older, more porous asphalt, a squeegee application is king. It physically works the sealer into every nook and cranny, creating an incredibly strong mechanical bond.
For the second coat, or on newer, smoother asphalt, a spray application provides that flawless, uniform finish that clients love. In fact, many pros use a hybrid approach: a heavy first coat by squeegee, followed by a pristine top coat with a sprayer.
Essential Tools and Personal Protective Equipment
Walking onto a job site without the right gear is a recipe for inefficiency and, worse, injury. Get your toolkit staged and ready before a single bucket is opened.
- Seal Coat Mixer: A heavy-duty drill with a paddle mixer is a must for getting a homogenous mix of sealer and additives.
- Application Tools: Professional-grade seal coat squeegees and/or a spray system with the correct tip size for your material.
- Cleaning Equipment: A power blower, pressure washer, and a few stiff-bristled brooms are your best friends during prep.
- Detailing Tools: Have some small brushes handy for cutting in neatly around concrete curbs, light pole bases, and building foundations.
- Personal Protective Equipment (PPE): This is absolutely non-negotiable. Always wear safety glasses, chemical-resistant gloves, and old work boots. If you're spraying, a respirator is a must to protect your lungs.
Finally, don’t forget that a perfectly sealed lot is incomplete without crisp, clear markings. After the sealer cures, the final step is restriping. Be sure to look over our guide on choosing the right parking lot paint to make sure your finished project is not only protected but also safe and compliant.
Mastering Professional Application Techniques
With the surface cleaned, patched, and prepped, you're ready for the main event. The application itself is where the real artistry of a professional sealcoating job comes into play. It's the difference between a flawless, long-lasting finish and a streaky, amateur job that starts to fail within a year. Spreading material is just the start; this is all about precision, consistency, and truly understanding how the product behaves.
The first step is always getting the mix right. Professional-grade sealer isn't ready straight out of the bucket—it needs to be agitated thoroughly to make sure any solids that have settled are fully suspended. This is non-negotiable. A heavy-duty drill with a paddle mixer is your best friend here, ensuring you get a smooth, homogenous liquid that will lay down perfectly even.
Achieving the Ideal Sealer Consistency
If your job specs call for additives, like sand for better grip or polymers for extra durability, now’s the time to mix them in. Follow the manufacturer's directions to the letter. Adding too much water to thin it out or skimping on an additive can completely undermine the sealer's integrity, leaving you with a weak and ineffective coating.
For a typical high-traffic commercial lot, you might add two to three pounds of sand per gallon of sealer. This provides just enough texture for pedestrian safety without making the mix too thick to work with. Get it too thick, and it becomes a nightmare to spread, leading to a lumpy, uneven mess.
This flowchart walks through the key decisions in the sealcoating process, from materials and additives to the tools for the job.

As you can see, a great outcome is the result of making the right choices at every stage. It’s all about tailoring the application to the property’s specific demands.
Executing Squeegee and Spray Applications
Once your sealer is perfectly mixed, it's go-time. Whether you're using a squeegee or a sprayer, the single most critical technique is to maintain a wet edge. This simply means you always overlap your strokes, applying fresh material onto the edge of what you just laid down before it has a chance to start drying.
If you don't maintain a wet edge, you'll end up with ugly seams and visible application lines that scream "amateur." The best approach is to work methodically in manageable sections. Pour out a "ribbon" of sealer, spread it evenly, and then pour the next ribbon right beside it, blending the edges seamlessly.
From the Field: When you're using a squeegee, use overlapping, U-shaped strokes and pull the sealer toward you for the smoothest finish. If you're spraying, stick to a consistent side-to-side motion with a 50% overlap on each pass. This is the only way to guarantee uniform coverage and avoid those dreaded light and dark stripes.
This whole process demands discipline. The asphalt needs to be fully cured (ideally for 6-12 months), swept clean, and all cracks filled before you even think about sealing. As you apply, aim for a coverage rate of 40-100 square feet per gallon, depending on how porous the surface is. The data doesn't lie: a proper seal coat helps asphalt resist oil penetration 70% better and can extend pavement life by 5-7 years. For property managers, that translates into cutting lifetime maintenance costs by up to 30%.
Calculating Coverage Rates and Applying Thin Coats
One of the worst—and most common—mistakes is getting your material estimate wrong. Running out of sealer mid-job is a catastrophe, but buying way too much is just throwing money away. A quick calculation solves this.
Here's the simple formula we use:
- Total Square Footage / Manufacturer's Coverage Rate = Gallons Needed Per Coat
So, for a 20,000-square-foot parking lot where the sealer covers 80 square feet per gallon, you'll need 250 gallons for a single coat (20,000 / 80 = 250). Simple as that.
Finally, remember the golden rule of sealcoating: always apply two thin coats instead of one thick one. A single, heavy coat might feel like a shortcut, but it traps moisture, cures poorly, and is far more likely to track and crack. Two thin coats—with the second applied at a 90-degree angle to the first—create a stronger, more flexible, and vastly more durable barrier. For those overseeing big projects, using a solid construction quality control checklist helps ensure every one of these steps is done to a professional standard.
Timing the Job: Weather, Curing, and Post-Application Care
You can do everything right—perfect prep, top-shelf materials, flawless application—but if you get the timing wrong, the entire job can fail. Once the sealer is down, you're at the mercy of the environment. Weather isn't just a small detail; it's the single biggest factor that dictates whether your seal coat cures into a durable, protective layer or turns into a sticky, tracked-up mess.
Applying a seal coat is all about getting the water out of the emulsion so the asphalt solids can lock together. Temperature, humidity, and direct sunlight are the three drivers of this process. I've seen more jobs ruined by a surprise cold front or an unexpected shower than by any other mistake. Ignoring the forecast is a costly gamble.
Planning Your Project Around the Forecast
Here’s the absolute, non-negotiable rule of thumb: you need the ground and air temperature to be at least 50°F (10°C) and rising. This isn’t a loose guideline; it’s a hard chemical requirement. Below this temperature, the water simply won't evaporate efficiently, and the sealer won't form a proper film.
Even more critical, that temperature needs to hold steady for a minimum of 24 hours after you've finished. A sudden dip overnight can literally stop the curing process dead in its tracks. You'll come back in the morning to a soft, tacky surface that can be scarred by a stray cat, let alone a car tire.
Before you even mix your first pail, check the forecast for these conditions:
- Stable Temperatures: Find a solid 48-hour window where the temps, including overnight lows, are safely above 50°F.
- Zero Rain: A rain shower within the first 24 hours will wash uncured sealer right down the drain, leaving you with a streaky disaster.
- Low Humidity: Think of a humid day as a wet blanket smothering your sealer. It dramatically slows evaporation and extends cure times. A warm, dry day with a light breeze is perfect.
- Sunshine: The sun is your best friend. Its warmth and UV rays are a powerful catalyst for the curing process. A cloudy, overcast day means you’ll be waiting a lot longer for the lot to be ready.
Understanding How Seal Coat Cures
Once the sealer is applied, the real work begins as the water starts to evaporate. This is when you see the coating transform from a muddy brown color to that deep, uniform black.
As the water leaves, the microscopic asphalt particles and polymer additives are drawn tightly together. They essentially fuse into a single, tough, yet flexible matrix that grips the pavement surface. This is what provides the protection.
Field Tip: Curing and drying are two different things. A seal coat might feel dry to the touch in a few hours, but it’s far from cured. Full curing can take 24 to 48 hours, sometimes longer. Letting traffic on it too soon is the #1 cause of those ugly power-steering scuffs and tire tracks that never go away.
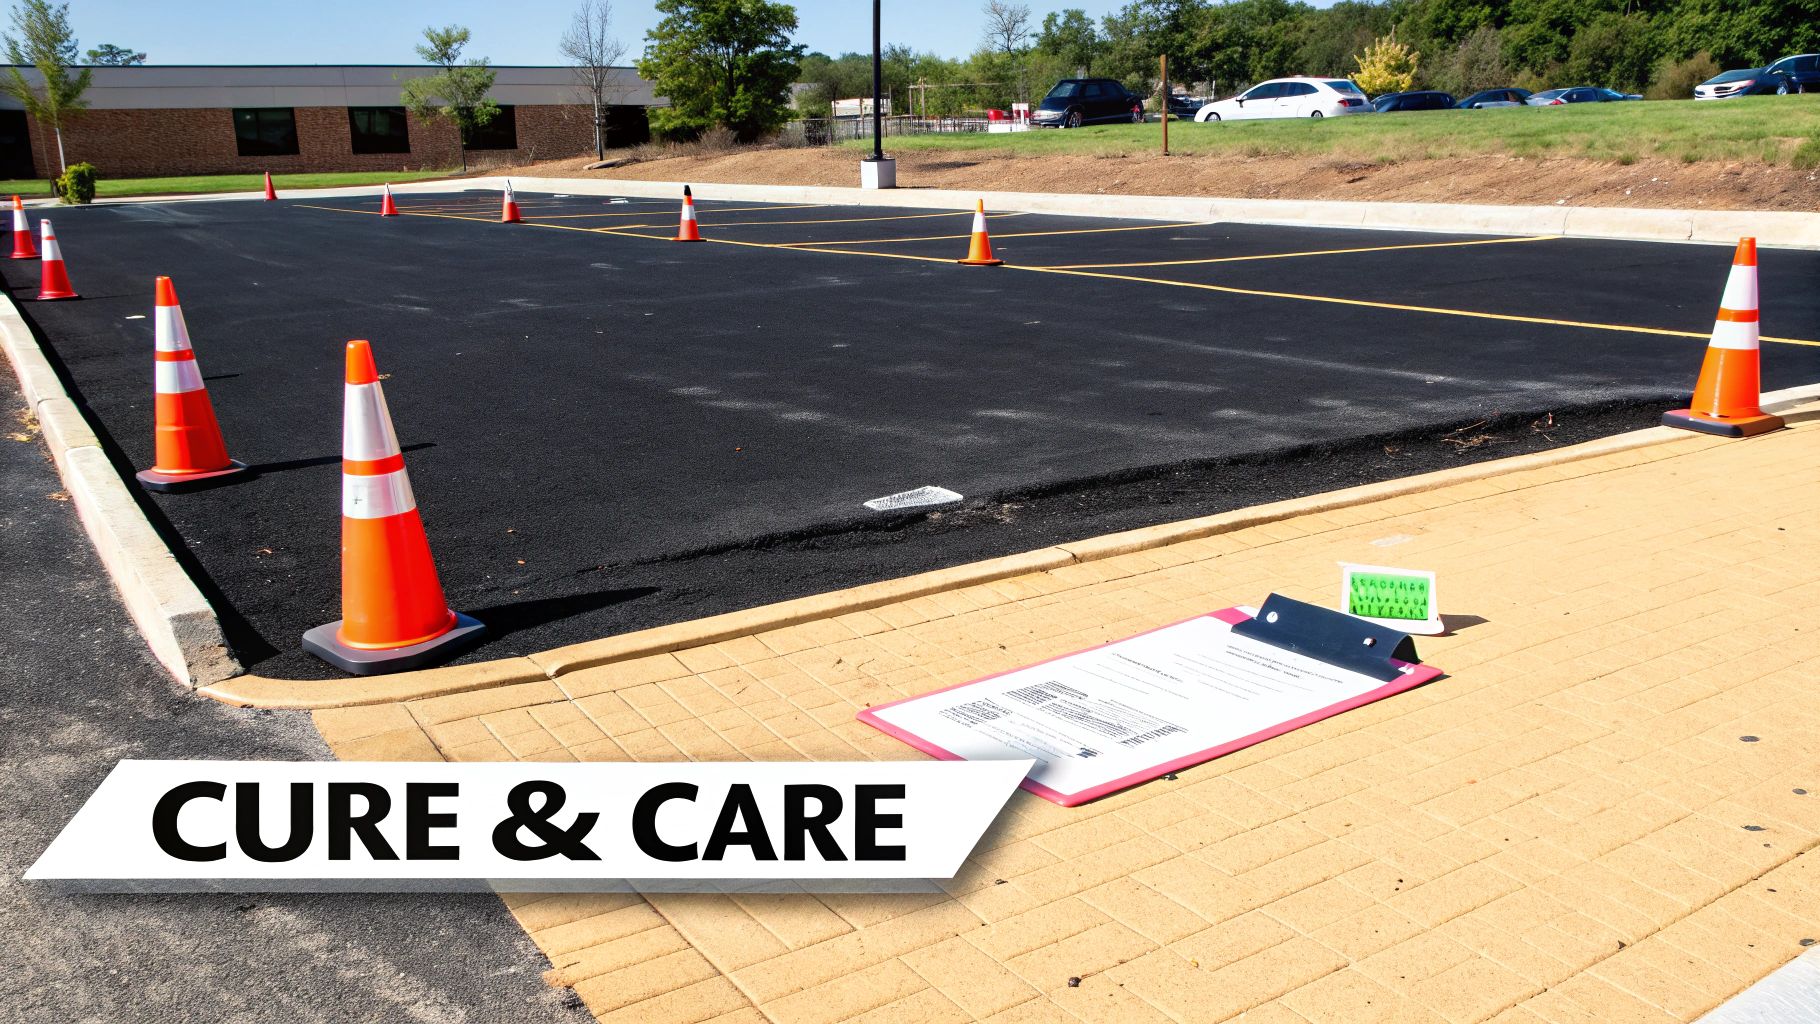
Managing Traffic and Aftercare
Your job isn't done until the lot is safely back in service. Roping off the area and clearly communicating the timeline is just as crucial as the application itself. You have to be strict about it.
Here are the timelines I use on my projects:
- Foot Traffic: Keep everyone off for a minimum of 24 hours. Even a single footprint can mar the finish while it's still soft.
- Vehicle Traffic: No cars for at least 48 hours. The twisting force of turning tires is especially brutal on a partially cured surface and will leave permanent marks.
- Line Striping: Wait a full 24 hours before you even think about laying down new paint. Painting over uncured sealer can cause the new lines to discolor and peel prematurely.
Once the lot is fully cured and open, a little preventative maintenance goes a long way. Regular sweeping removes abrasive grit that acts like sandpaper under tires. It's also smart to clean up oil and fuel spills quickly, as they will chemically eat through the new protective layer. By following a consistent maintenance schedule and re-sealing every two to three years, a property owner can put off expensive asphalt replacement for decades.
When to Bring in the Sealcoating Pros
The do-it-yourself approach has its place, but commercial asphalt maintenance is a completely different ballgame. A residential driveway is one thing. A sprawling commercial parking lot with non-stop traffic, major liability concerns, and a web of local regulations is another beast entirely. Knowing the how of sealcoating is great, but knowing when to call in a professional is what truly protects your investment.
Trying to tackle a large-scale project without the right experience almost always ends in a shoddy job that costs a fortune to fix later. Hiring a pro isn't about taking the easy way out; it's a strategic decision to lock in durability, compliance, and long-term value for your property.
Know When a Project is Out of Your League
Often, the sheer size of the job is the first big red flag. A multi-acre lot for a shopping mall or an industrial park demands specialized, high-volume equipment that simply isn't practical for an in-house team to own or rent.
Here are a few factors that scream "call a professional":
- Size: Once you get over 10,000 square feet, you're facing a serious logistical challenge. Pros roll in with large tank sprayers and ride-on equipment that lay down sealer quickly and evenly—something you just can't replicate with a bucket and a squeegee.
- Existing Damage: If your walk-through uncovered deep alligator cracking, a minefield of potholes, or signs of base failure, you're looking at more than a cosmetic touch-up. A professional contractor can diagnose the root cause and handle the heavy-duty asphalt repairs, giving the new sealcoat a solid foundation to bond to.
- Complex Logistics: Juggling traffic, taping off parking areas in stages, and working overnight to avoid disrupting customers or tenants takes serious coordination. For a professional crew, that’s just another day at the office.
Think about a busy hospital parking lot. You can't just shut it down for the weekend. A pro will map out a phased plan, sealing off one section at a time to make sure patient and emergency vehicle access is never, ever compromised.
The Value of Professional-Grade Work
Bringing in an experienced contractor offers real-world advantages that go way beyond just getting the sealer on the ground. They bring a level of precision and quality that directly impacts how long your pavement lasts and how safe your property is.
The biggest perks are the materials and equipment they use. Contractors buy professional-grade sealer in bulk, often with specific polymer additives already mixed in to stand up to the abuse of a high-traffic commercial lot. Their calibrated spray equipment guarantees a perfectly even coat thickness, which is the secret to proper curing and a long wear life.
A consistent, professional sealcoating program can save a property owner as much as $120,000 in repair costs on a 30,000-square-foot lot over a 15-year period. It’s clear that professional application isn't just an expense—it's one of the smartest cost-saving measures you can take.
Staying Compliant and Thinking Long-Term
Commercial properties are bound by a host of local and federal rules, from ADA (Americans with Disabilities Act) requirements for parking stalls to specific fire lane codes. A reputable contractor knows these regulations inside and out. They ensure that after the new blacktop is down, the line striping is 100% compliant, saving you from headaches, fines, and potential lawsuits.
At the end of the day, the math just doesn't work for a large-scale DIY job. Simple mistakes—like skipping a crucial prep step, mixing the sealer wrong, or applying it in bad weather—can cause the entire coat to fail within months. Suddenly, you're paying to strip the bad job and then paying again to have it redone right, wiping out any money you thought you saved. A professional's work is an investment that pays for itself, plain and simple.
Common Questions About Asphalt Seal Coating
Even the most detailed plan can leave you with questions once the rubber meets the road—or in this case, the squeegee meets the asphalt. Over the years, I've heard just about every question you can imagine from facility managers trying to protect their investment.
Getting these details right is what separates a job that just looks good for a few months from one that truly protects your pavement for years. Let's dig into the most common ones I hear out in the field.
How Often Should I Seal Coat a Commercial Parking Lot?
This is the big one. For a typical commercial lot that sees steady traffic, you should be on a two to three-year cycle. Think of it like preventive maintenance. This schedule keeps a tough, protective layer between your asphalt and everything that wants to destroy it: UV rays, water, and vehicle fluids.
But there's a critical exception for new pavement. You have to let brand-new asphalt cure and harden, which means waiting at least 90 days before its first seal coat. Honestly, waiting closer to a year is even better. Sealing too soon traps the oils that need to evaporate, leaving you with a soft surface that's prone to damage.
What Is the Best Weather for Applying Seal Coat?
I can't stress this enough: weather is the single most important factor for a successful job. You’re looking for a perfect trifecta: sunny skies, low humidity, and a ground temperature of at least 50°F (10°C) and climbing.
And it’s not just about the daytime temperature. The pavement needs to stay above 50°F for the entire 24- to 48-hour curing window, and that includes overnight.
A Pro's Warning: If there's even a slight chance of rain in the next 24 hours, pack it up. A surprise shower on a fresh coat of sealer is a disaster. It washes the material away, leaving a streaky, diluted mess that offers zero protection. It's a costly mistake you only make once.
Trying to seal in cold or damp weather is a recipe for failure. The water in the sealer can't evaporate properly, resulting in a weak coat that will show tire marks and fail way ahead of schedule.
Can I Seal Coat Directly Over Oil Stains and Cracks?
Absolutely not. This is probably the most common and damaging shortcut people take. Seal coat is a surface treatment; it needs a clean, stable base to bond to.
Oil Stains: Sealer will not stick to oil or fuel spots. Period. The petroleum residue pushes it away, and within a few weeks, you'll see it peeling right off. You must clean these spots with a good degreaser first, then apply an oil spot primer to create a barrier the sealer can grip.
Cracks: Any crack wider than a credit card is too big to be ignored. You need to clean them out completely and fill them with a flexible, rubberized crack filler before you seal. Seal coat is just a thin paint-like layer—it has no structural strength and will simply sink into an unfilled crack and split open as soon as the pavement moves.
Skipping these prep steps is just throwing your money away.
What Is the Difference Between Asphalt Emulsion and Coal Tar Sealers?
This question used to be a real debate, but today, the industry has a clear winner.
Asphalt emulsion sealers are the professional standard now. They're petroleum-based, which makes them chemically compatible with the asphalt pavement they're protecting. This creates a much more natural, flexible bond that moves with the pavement. They also stay blacker longer and are far better for the environment, with very low levels of Polycyclic Aromatic Hydrocarbons (PAHs).
Coal tar sealers are an older technology. While they have a reputation for being tough against fuel spills, they're also rigid, which makes them brittle and prone to cracking. More importantly, they contain high levels of PAHs, and because of the associated health and environmental risks, many states and cities have banned them outright. For any modern commercial project, a quality asphalt emulsion sealer is the smarter, safer, and superior choice.
Navigating the details of a commercial seal coating project requires expertise. If you want to ensure your Houston-area property receives a durable, professional application that stands the test of time, trust the experts at Houston Parking Lot Striping. Learn more about our comprehensive seal coating services.